Getting Started
Getting Started
- Once the required plugins are installed, go to the WordPress Admin Dashboard → Points → Add-ons.
- Activate the buyCred Add-on.
- Hover on the Add-on, and the Activate button will appear.
- Activate the Badges Add-on.

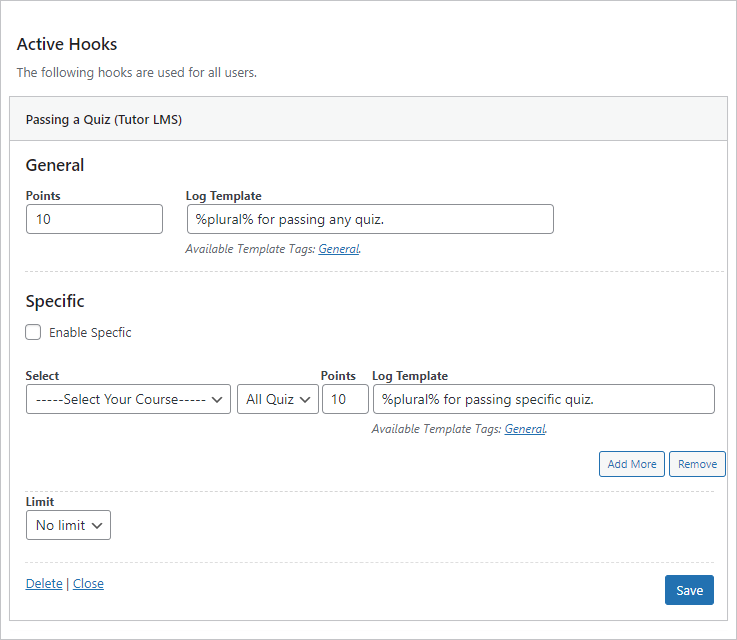
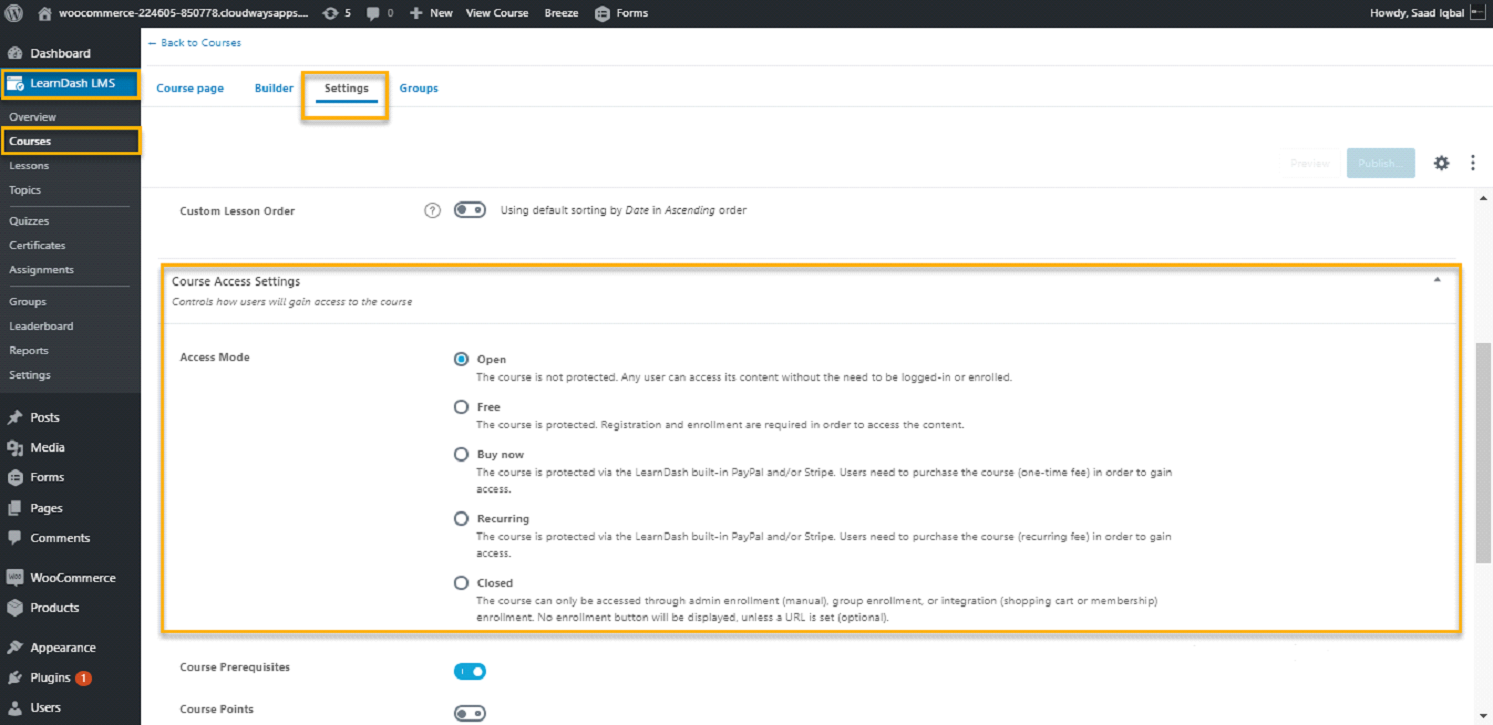
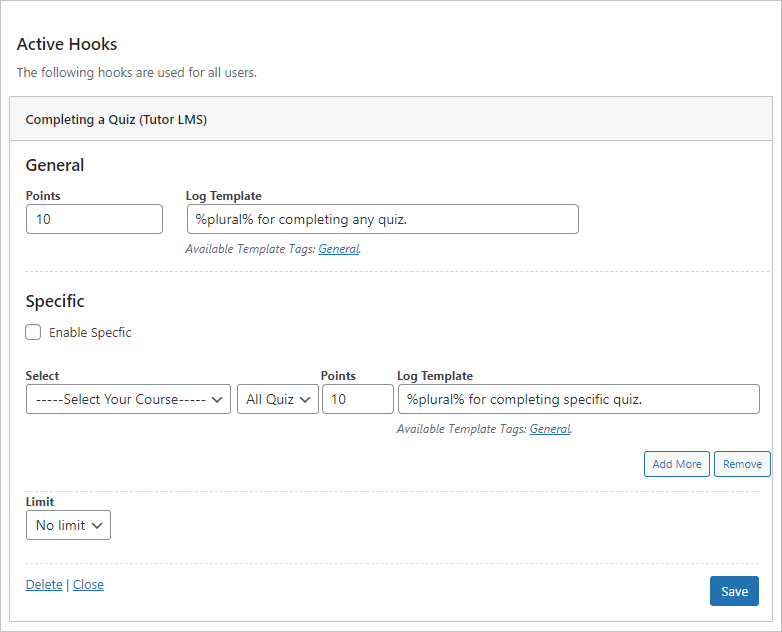
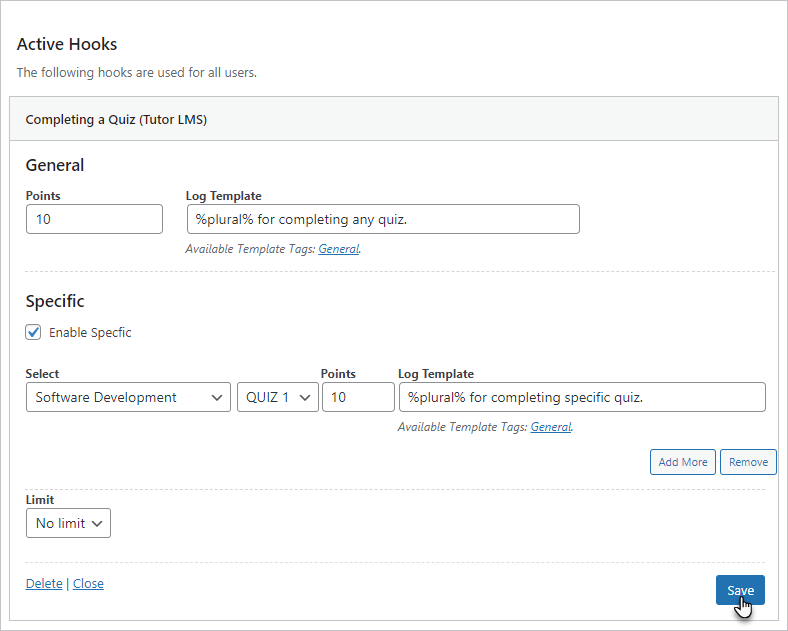
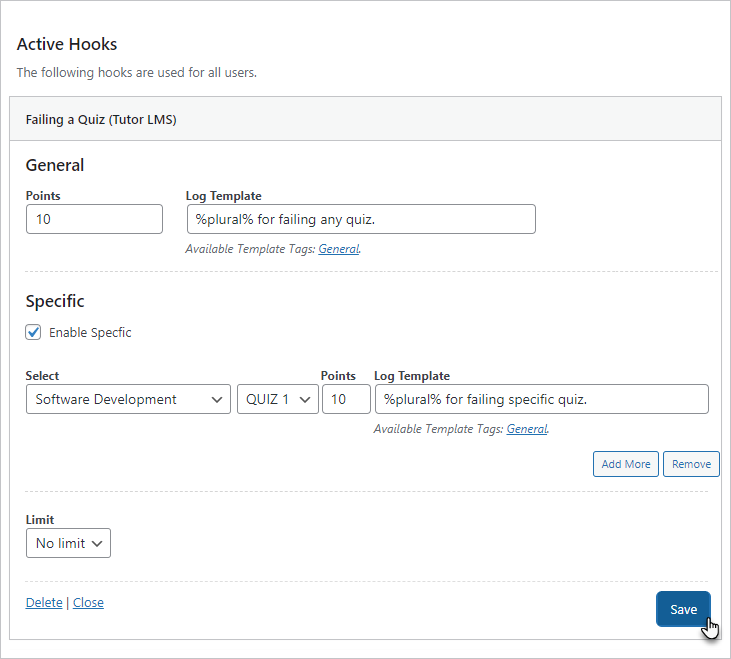
- Once done, go to Admin Dashboard → Points → Settings.

- Once you’re on the Settings page, click on the Badges to open the settings.
- Checkmark the Enable Open Badge checkbox.
Sync Admin with Badgr
NOTE: Make sure you have created an account on Badgr. If you don’t have an account, click on https://badgr.com/auth/signup to create a new account.
Go to Admin Dashboard → Points → Settings.
- Once you’re on the Settings page, click on the Badgr to open the settings.
- Enter the required credentials of your Badgr account.
- Click on the Sync button.
- Once the operation is successful, you’ll be notified that your account has been Connected!.
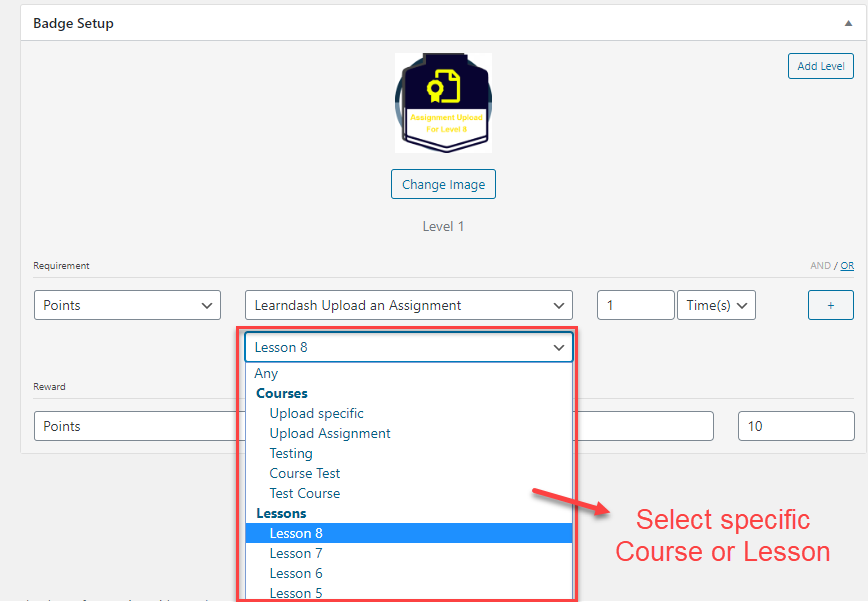
- Now navigate to the Admin Dashboard → Points → Badges.

- Click on the Add New button.
- Click on the Add New button.
- Add the Title of your Badge.
- Enter Description of your Badge.
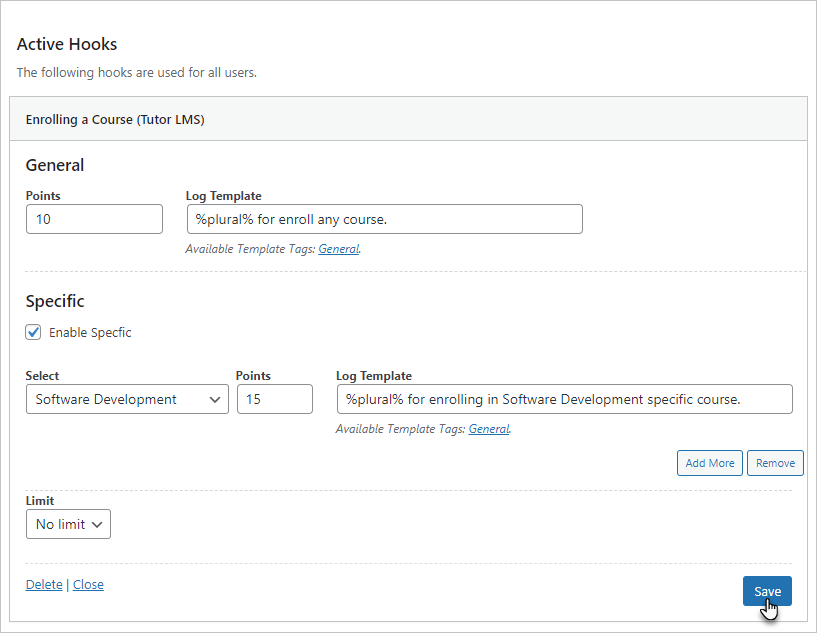
- Select the Achievement Type of your badge or create a new one.
- Insert Badge Image.
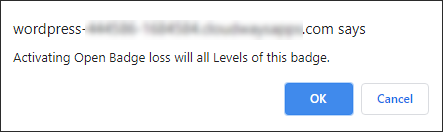
- Checkmark This badge is Open Badge checkbox in the Open Badge section.

- When you’ll checkmark the This badge is Open Badge checkbox in the Open Badge section, a pop up will appear,
- Click the Okay button.
- Once done, click on the Publish button.

- Now go login into your Badgr account and go to the Issuers section or if you’re already logged in, click on https://badgr.com/issuers.
- When we created the open badge on our WP website, it will also be created in the Badgr platform.
- Since we didn’t have any issuers before creating a new open badge, when we visit the Issuers section, it may appear as You don’t have any issuers yet. We have to refresh the page so the issuers and the badge would appear on the Badgr platform.
- Click on the View Issuer button to view the details of that respective issuer.

- Click on the Badge to view the details of that respective badge.
Sync Admin with Badgr
- The Admin will navigate to the WordPress Admin Dashboard → Users.
- Hover over any user to view the suboptions.
- Click on the Edit button.
- Go to the Badges section and checkmark the Earned checkbox.
- Click on the Update User button.
- Now when go to WordPress Admin Dashboard → Pages → Add New.
- A new page would open.
- Add the Title of the page.
- Now paste the shortcode [mycred_badgr_login].
- Click on the Publish button.
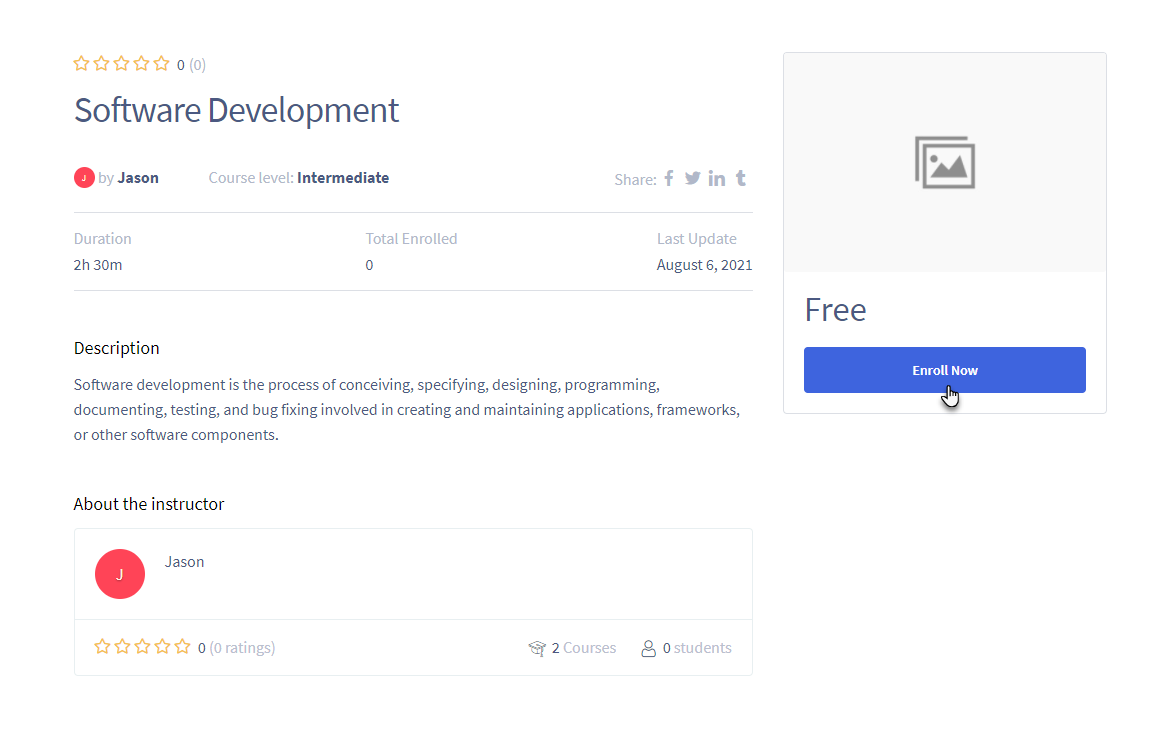
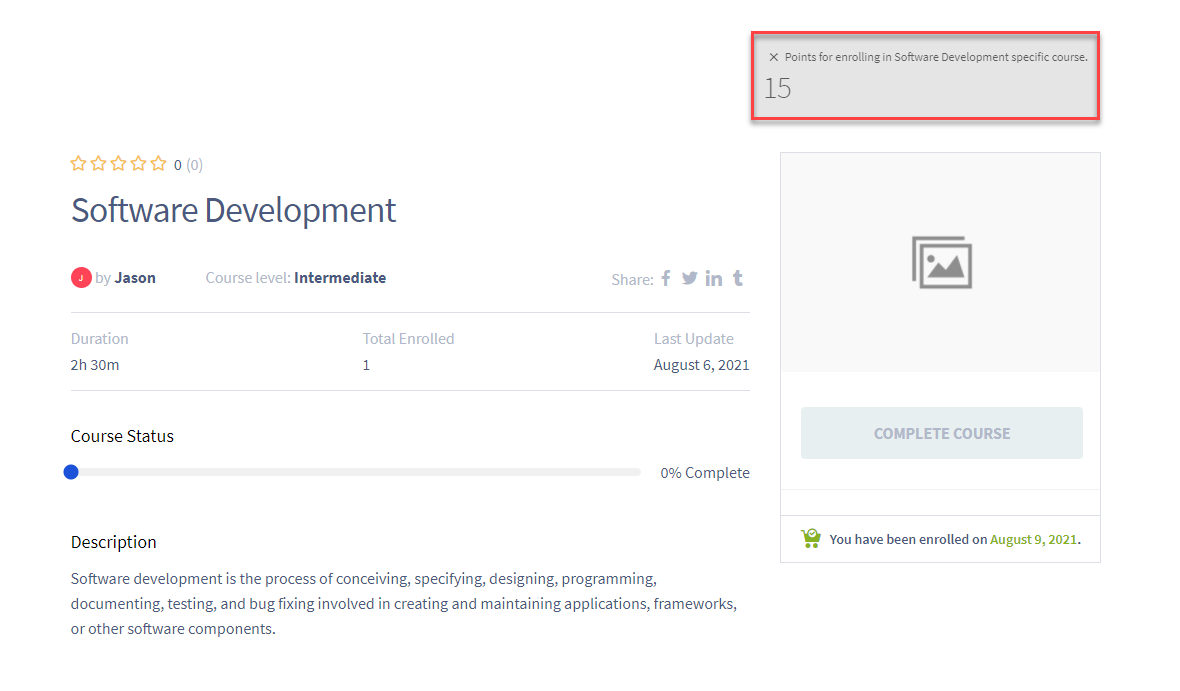
- Now, when the user will go to the website and go to the page where the shortcode was pasted.
- Once the operation is successful, you’ll be notified that your account has been Connected!.

- Click on the Sync button.
- Now the same user will also login into his Badgr account.
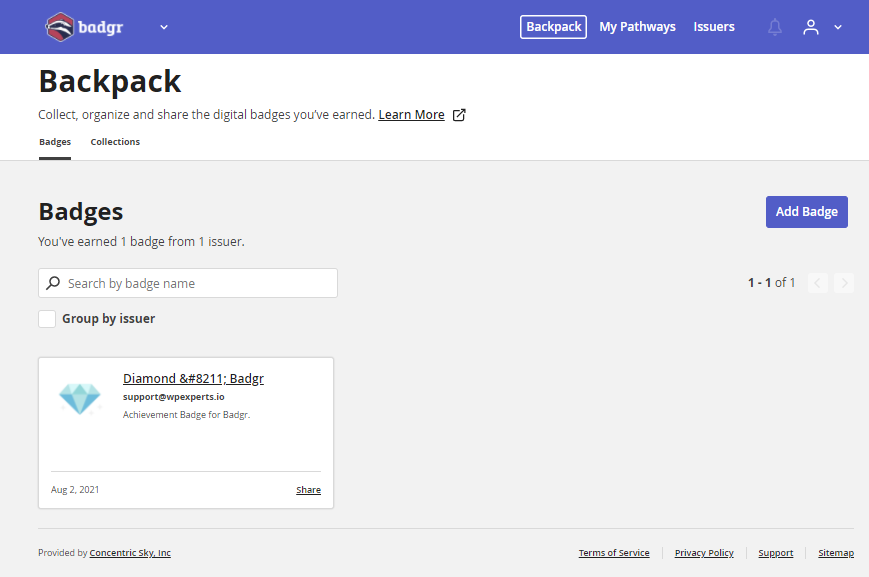
- Click on the Backpack tab.
- If the badge doesn’t appear, then refresh the page, and after 1 minute, the badge would appear on the Badgr platform.
- Click on the badge to view its details.