This tool allows the admin to import and export Setup, Points, Badges, and Ranks User data from one website to another.
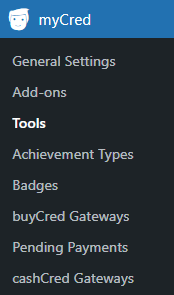
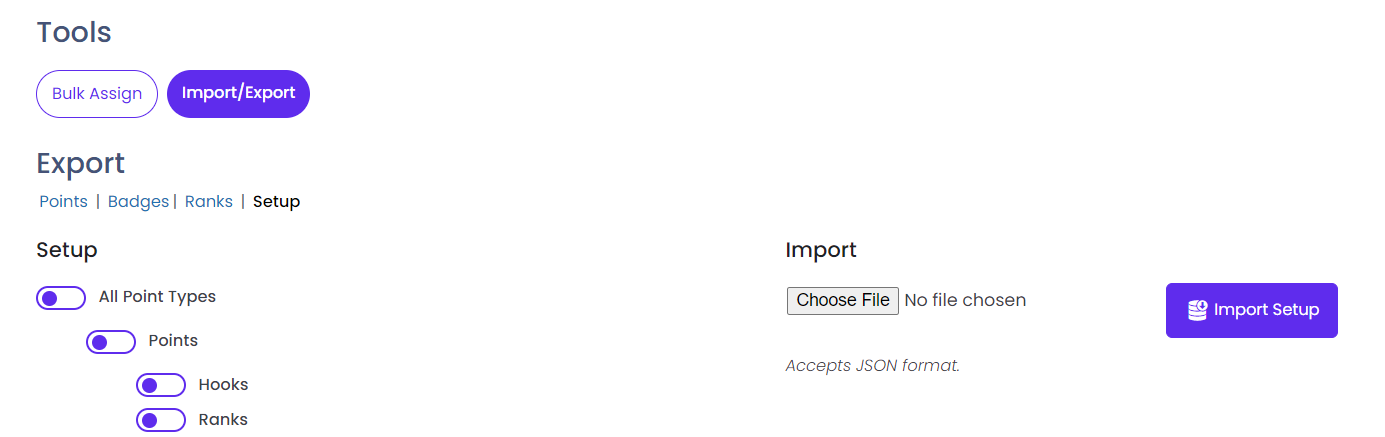
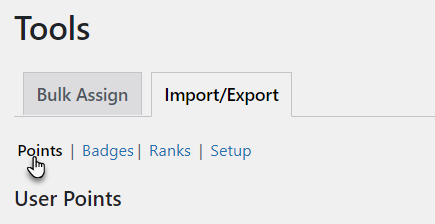
Navigate to the WordPress Admin Dashboard → myCred → Tools.
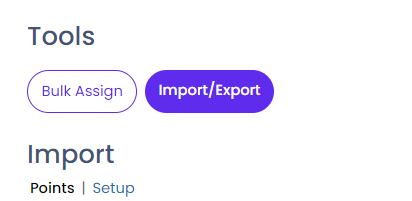
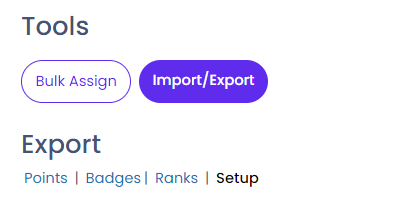
In the Tools section, select Import/Export.
In the Import/Export section, select the Points, Badges, Ranks, or Setup tab.
Setup
Note: Setup import/export only accepts JSON format.
If the admin wants to import the Point Types and Achievement Types setup from another website, select the setup from the tabs in the Tools section. This section contains the Import and Export section from where the admin can export the required setups including Achievements, Levels, Points, Badges, and Ranks in the form of JSON file and import them to another website.
Export Setup
To export setup from one website to another, select the setups from the first site you want to export.
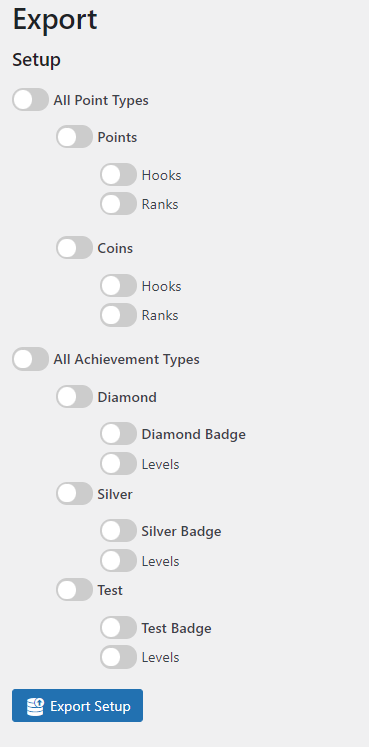
Go to the Export section in the Setup tab.
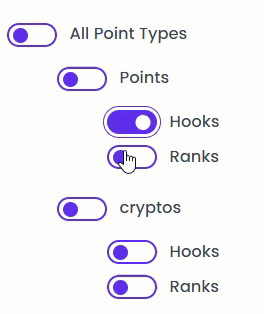
Select the specific point type along with Hooks and Ranks.
Or select the All Point Types to get all the Points data from the site.
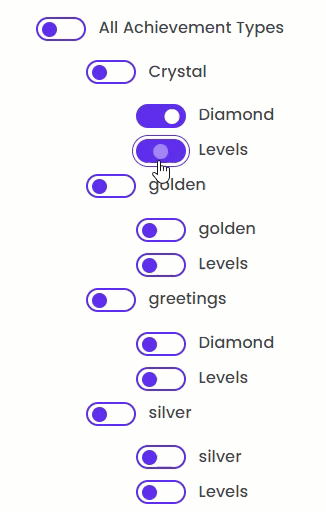
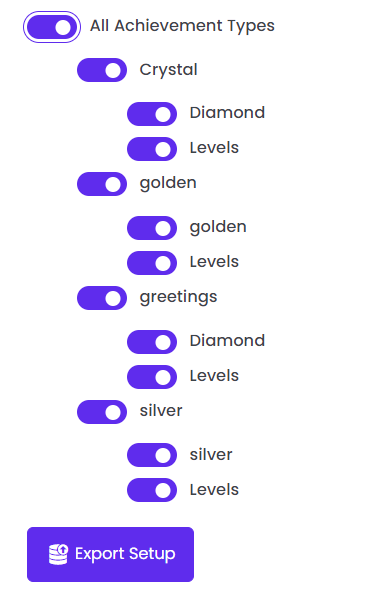
Select the specific Achievement Type along with the Badge and Levels.
Or select All Achievement Types to get all the achievements setup from the site.
Click on the Export Setup button.
A JSON file will start downloading.
Import Setup
Note: Setup will import only JSON format. Please do not edit the raw-setup.json file, else it will not work properly.
Go to your second website where you want to import the Setup.
Navigate to the WordPress Admin Dashboard → myCred → Tools.
Select Import/Export from the tab.
Click on the Setup tab.
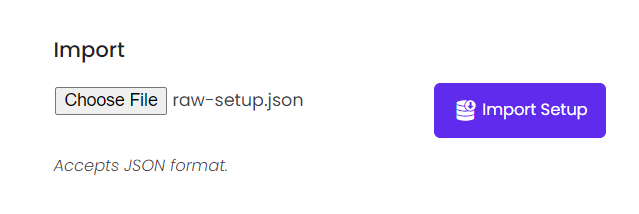
Locate the Import section on the right side.
Click on the Choose File button.
Select the exported raw-setup.json file or drag and drop the file.
It will start importing the file, and a loading icon will appear.
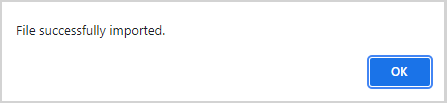
When the file is imported, a notification will appear on the top.
All the setups in the JSON file are imported and displayed in the export section.
Newly imported point type Coin is displayed in the Admin Panel.
Navigate to the WordPress Admin Dashboard → Coin → Hooks.
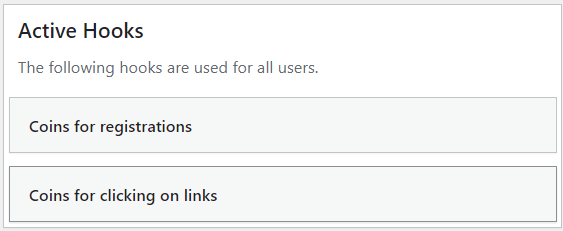
Imported Hooks are displayed in the active hooks section.
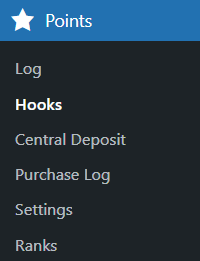
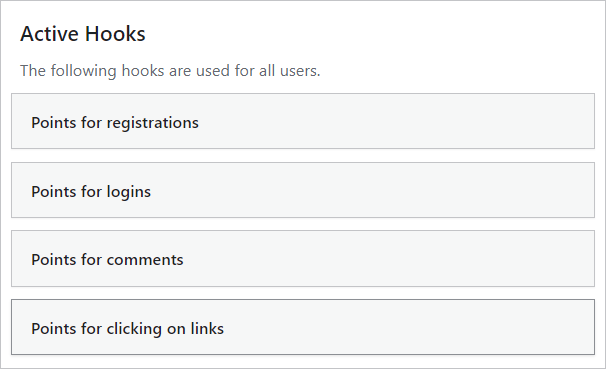
Navigate to the WordPress Admin Dashboard → Points → Hooks.
All the imported Hooks are displayed in the active hooks section.
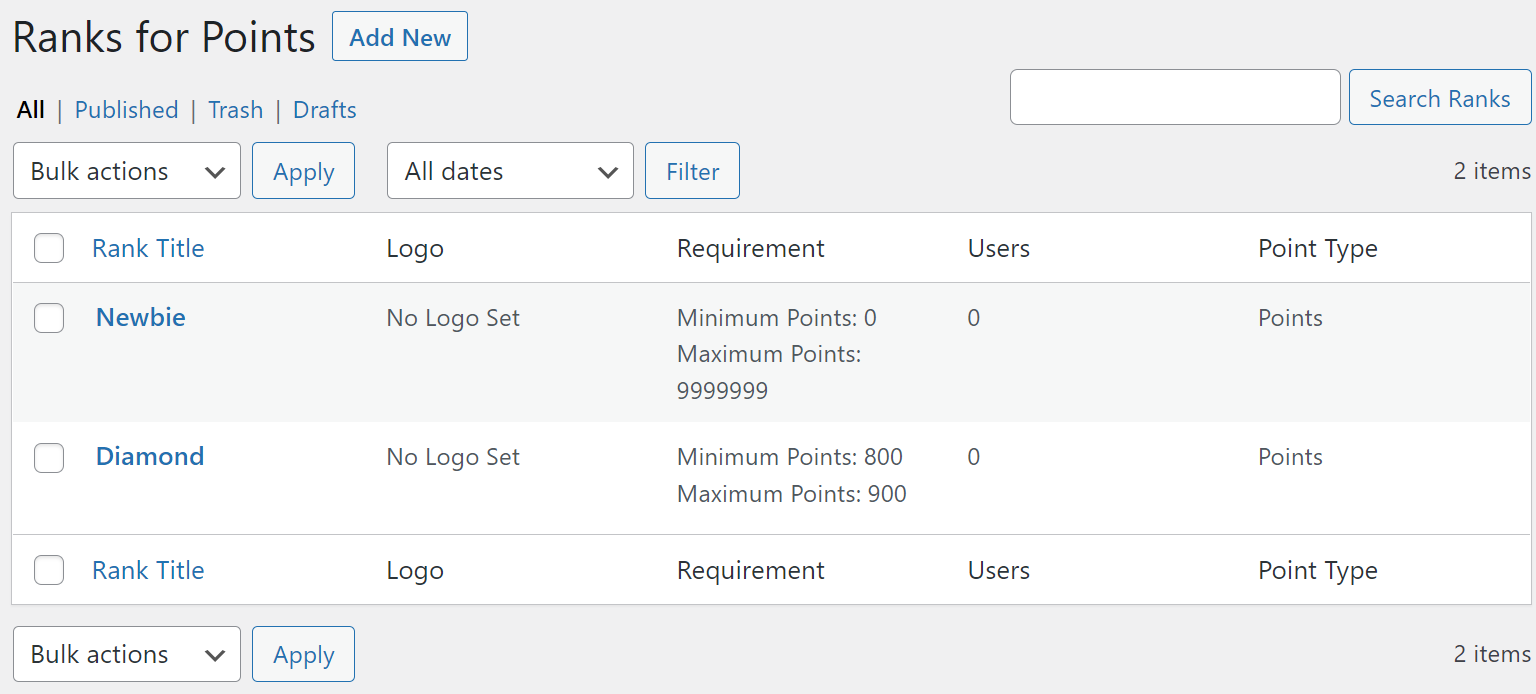
Now, navigate to the WordPress Admin Dashboard → Points → Ranks.
All the imported Ranks are displayed in the ranks table.
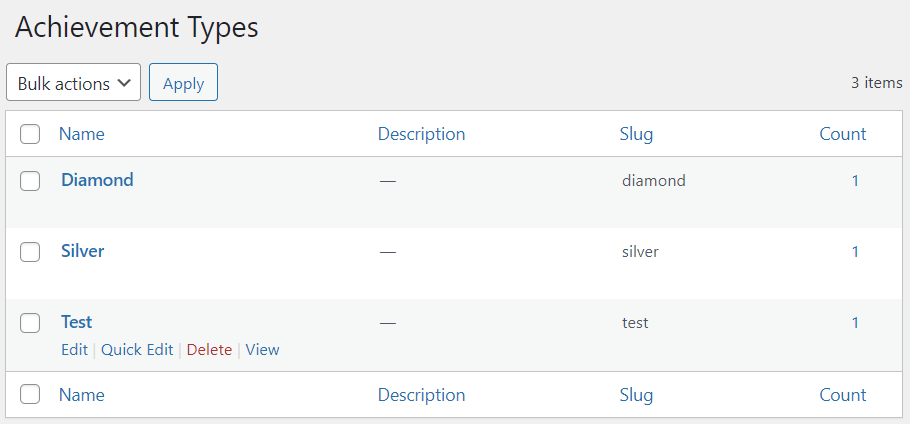
Now, navigate to the WordPress Admin Dashboard → myCred → Achievement Types.
All the imported Achievements are displayed in the Achievement Types table.
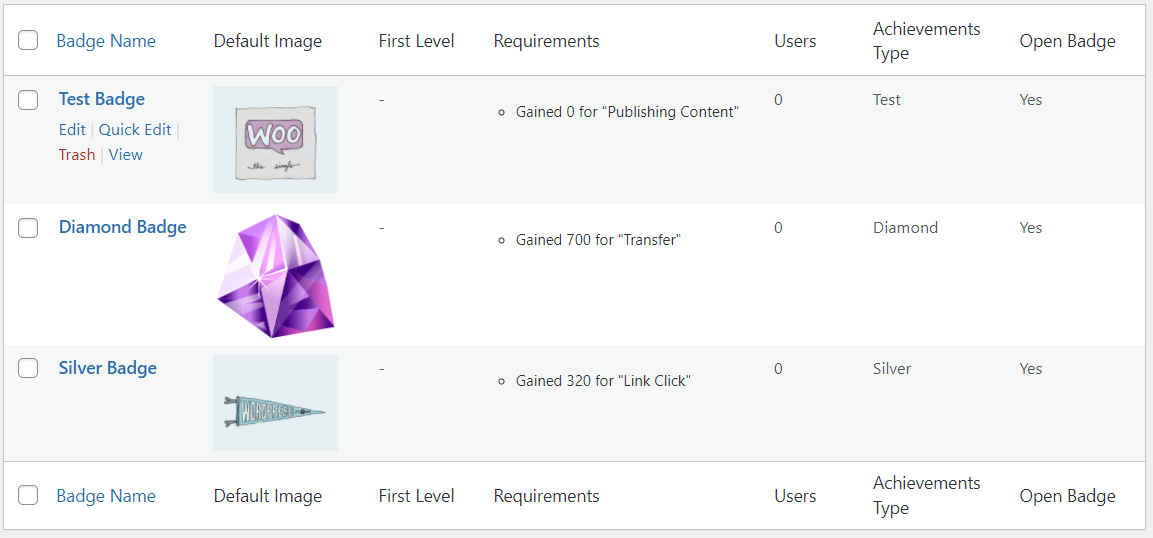
Now, navigate to the WordPress Admin Dashboard → myCred → Badges.
All the imported Badges are displayed in the badges table.
Points
Note: User Points import/export only accepts CSV format.
If the admin wants to import the User Points data from one website to another or manually assign points to the users by adding User Point data into a csv file and import it to another website, select the Points from the tabs in the Tools →Import/Export section.
This section contains an Import section from where the admin can download the raw-template.csv file and add the respective user points data in the given field without changing the headers, then this newly edited file can be imported to another site. The Admin can export the User Points data from one website and import it to another, but in this case, the admin has to check and edit the User IDs in the file so that the points can be given to the respective users.
Download Raw Template
Note: Do not change the headers in the CSV file.
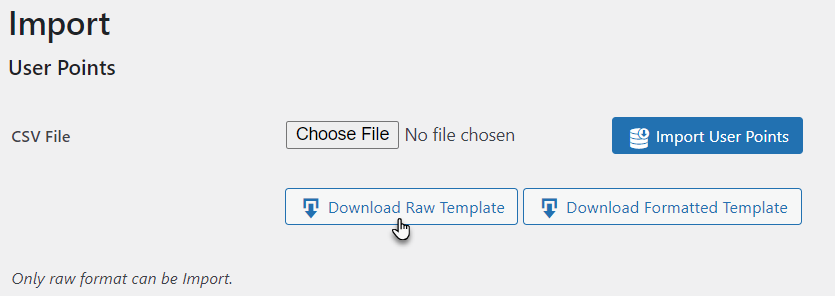
If the admin wants to add user points manually, go to the import section.
Click on the Download Raw Template button.
The raw CSV template file will start downloading.
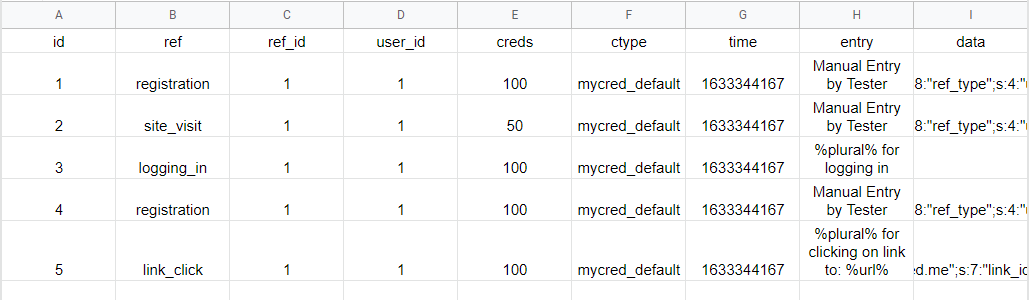
Locate the raw-points-template.csv in your local storage.
Open the template file.
Edit the file with the respective User data.
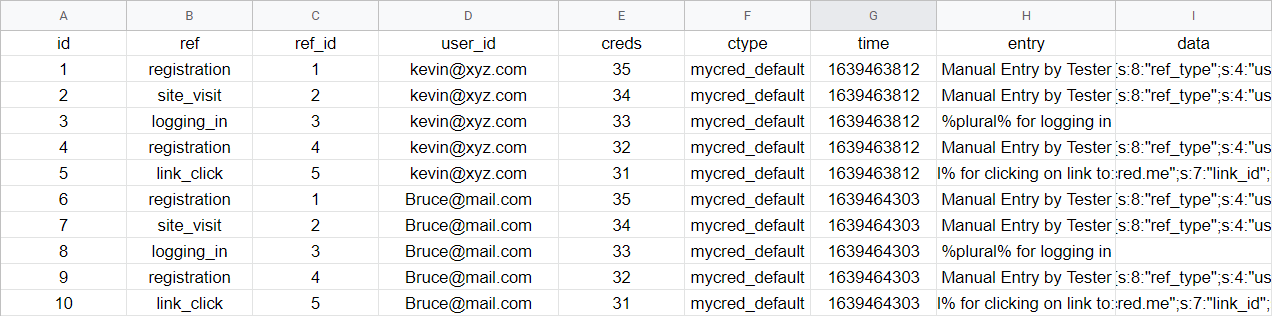
Enter the reference label in the Ref column, this identifies the activity for which the user received the points.
Enter the ref_id.
Enter the user_id of the User who will be receiving the points.
Enter the number of points in the creds column for the activity.
Enter the point type in the ctype column. Mycred_default is the default point type meta key, enter your point type meta key.
Enter the time in the time column.
Enter the Entry label of the point in the entry column for which activity it was received.
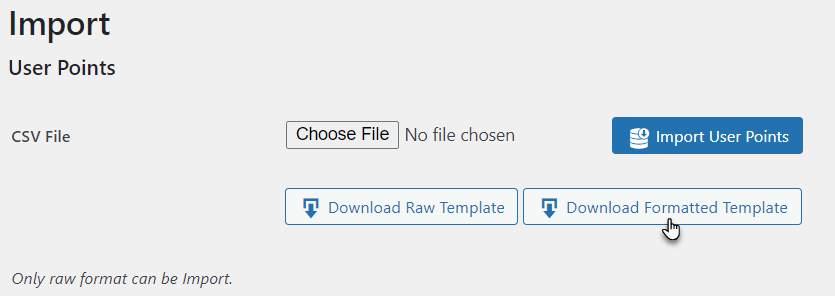
Download Formatted Template
Click on the Download Formatted Template button.
The formatted CSV template file will start downloading.
Locate the raw-formatted-template.csv in your local storage.
Open the template file.
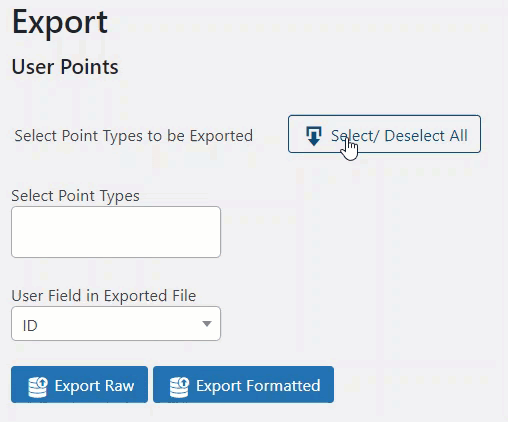
Export User Points
Go to the Export section.
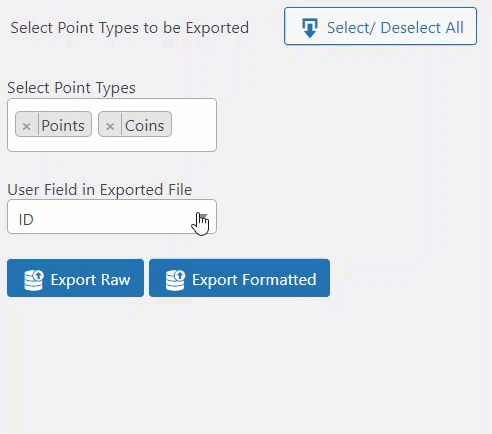
Select all the point types.
Or select a specific point type from the Select Point Type.
Select the User Field which you want in your exported file, and this user field can be a User ID, User Name, and User Email.
Click on the Export Raw button to download the raw user point file.
Or Click on the Export Formatted button to download the formatted user point file.
The file will start downloading.
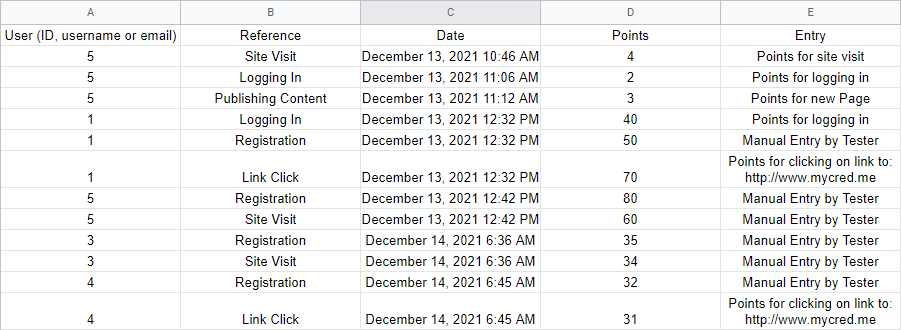
The raw-points file with the User ID field.
The formatted-points file.
The raw-points file with the User Name field.
The raw-points file with the User Email field.
Import User Points
Back-end Configuration
Note: Please import the edited raw-points.csv file only else it will not work properly.
First, check the User ID of the users from WordPress Admin Dashboard → Users on your new website.
Now, open your raw-points.csv file and edit the User ID of the users you want to assign the points for your new website.
Go to your second website, where you want to import User Points data.
Navigate to the WordPress Admin Dashboard → myCred → Tools.
Select Import/Export from the tab.
Click on the Points tab.
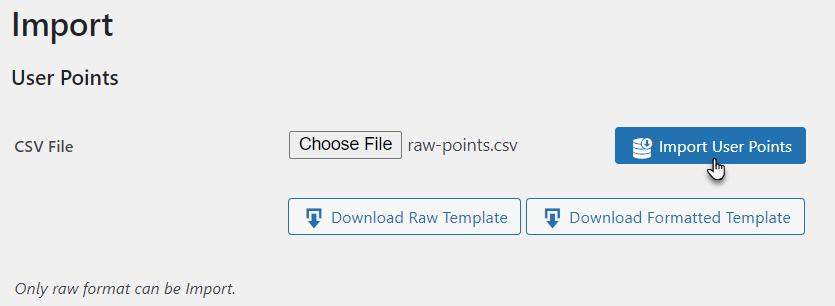
In the import section, click on the Choose File button and select the raw-point.csv from your local storage.
Click on the Import User Points button to start importing the user points data.
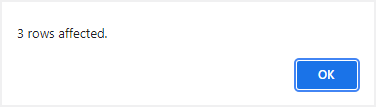
A confirmation message will be displayed, this shows the number of affected rows.
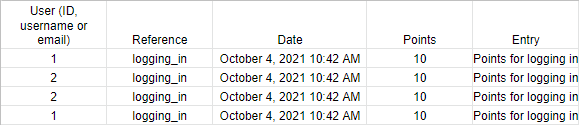
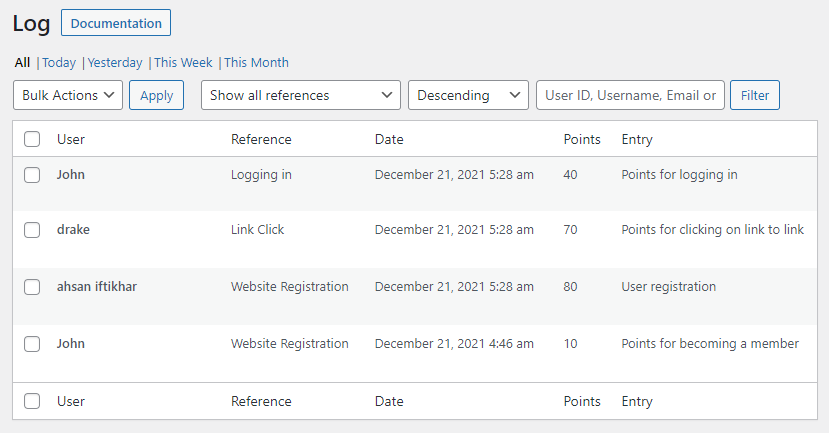
All the User point data is displayed in the Points Log section.
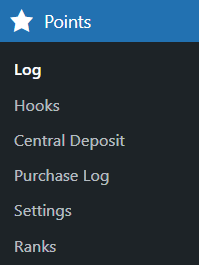
Navigate to the WordPress Admin Dashboard → Points → Log.
Imported User Point Data is displayed in the Log table.
Impact on Front-end
Go to your website.
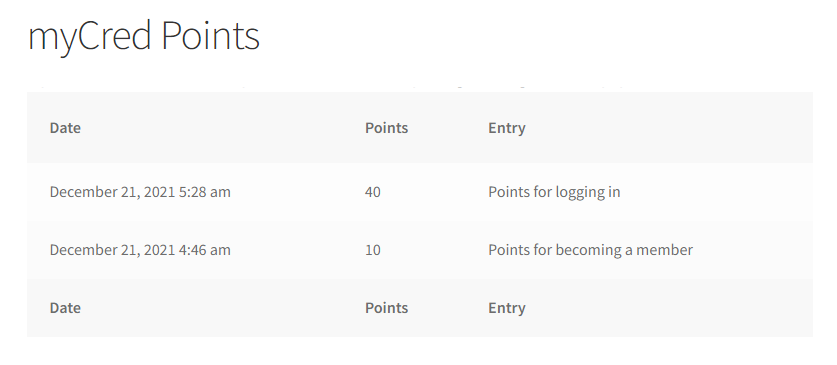
Imported User Points of all the users have been displayed in the Points History.
Imported User Points of the specific users have been displayed in the Points History.
Badges
Note: User Badges import/export only accepts CSV format.
If the admin wants to import the User Badges data from another website or manually assign the badges to the users by adding the User Badge data in the CSV file and importing it to another website, select the Badges from the tabs in the Tools →Import/Export section.
This section contains an Import section from where the admin can download the raw-template.csv file and add the respective user badge data in the given fields without changing the headers, then this newly edited file can be imported to another site. The Admin can export the User Badge data from one website and import it to another, but in this case, the admin has to check and edit the User IDs and Badge data in the file so that the badges can be awarded to the respective users.
Download Raw Template
Note: Do not change the headers in the CSV file.
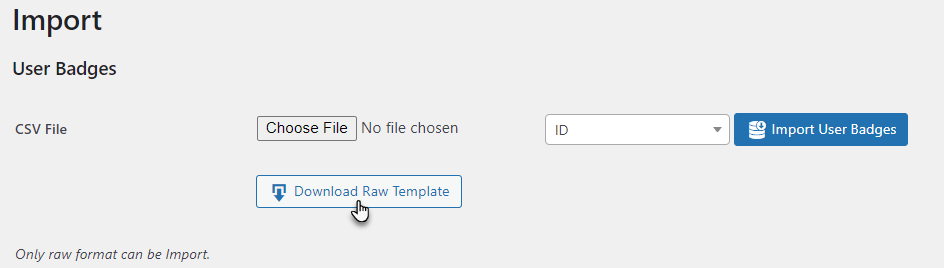
If the admin wants to assign badges to the users, go to the import section.
Click on the Download Raw Template button.
The raw CSV template file will start downloading.
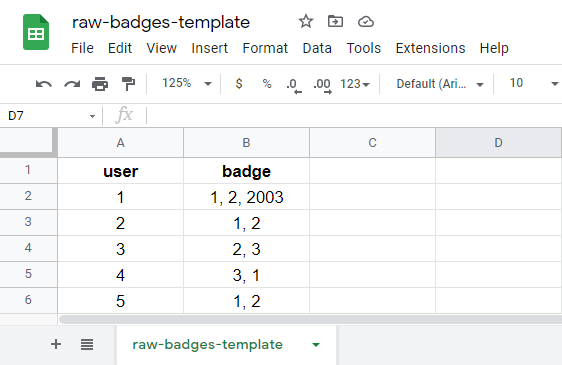
Locate the raw-badges-template.csv in your local storage.
Open the template file.
Edit the raw-template.csv and add the respective user data.
Enter User ID in the user column.
Enter Badge ID in the badge column.
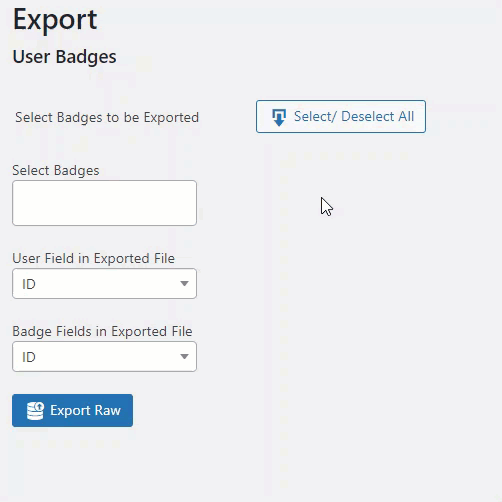
Export User Badges
Export Raw Template
Go to the Export section.
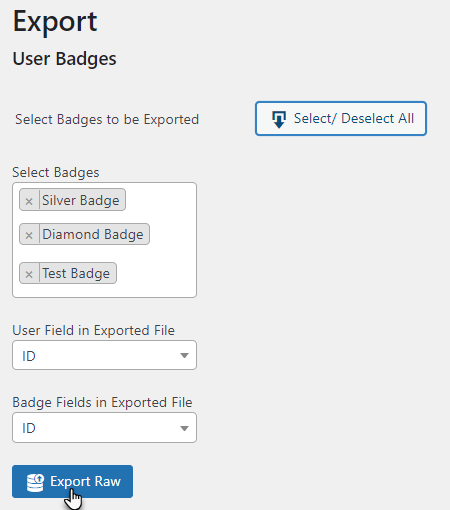
Click on the Select/Deselect All to select and deselect all Badges.
Or select a specific badge from the Select Badges.
Select the User Field which you want in your exported file, this user field can be a User ID, User Name, and User Email.
The admin can also select the Badge Field for the exported raw file, this badge field can be a Badge ID, Title and Slug.
Click on the Export Raw button.
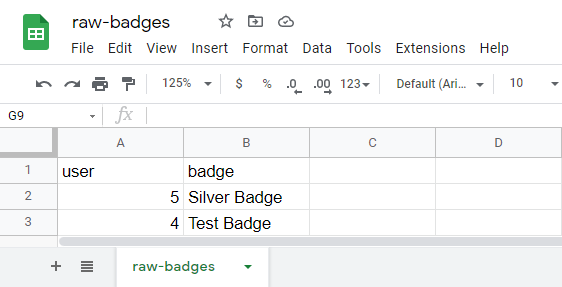
The file will start downloading.
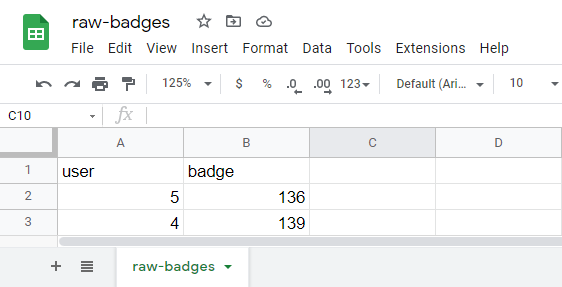
The raw-badges file with the User ID and Badge ID field.
The raw-badges file with the User ID and Badge Name field.
Import Badges Data
Back-end Configuration
Note: Please import the edited raw-badges.csv file only else it will not work properly.
First, check the User ID of the users from WordPress Admin Dashboard → Users and the Badge ID of the badges from WordPress Admin Dashboard → myCred → Badges on your new website.
Now, open your raw-badges.csv file and edit the User ID of the users and Badge ID of the badges in the user and badge column that you want to assign for your new website.
Or you can also edit the file and add the User Name and Badge Title in the user and badge column.
Go to your second website where you want to import User Badges data.
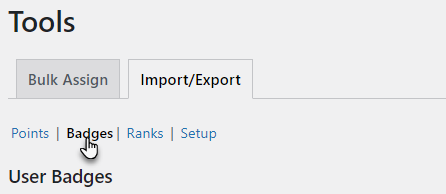
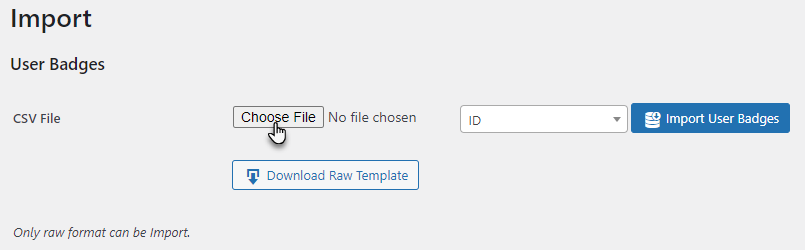
Navigate to the WordPress Admin Dashboard → myCred → Tools.
Select Import/Export from the tab.
Click on the Badges tab.
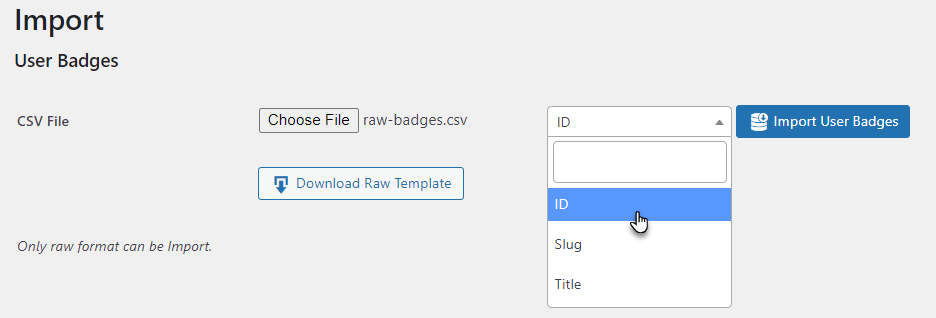
In the import section, click on the Choose File button and select the raw-badges.csv from your local storage.
Select the Badge Field that your file contains from the drop-down menu, in this case, our file contains Badge ID, so we will select ID.
Click on the Import User Badges button.
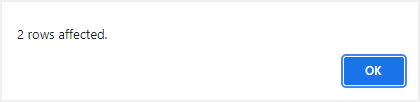
A confirmation message will be displayed, this shows the number of affected rows.
Now, navigate to the WordPress Admin Dashboard → myCred → Badges.
The badges that are awarded to the respective number of users are displayed in the Badges table.
Impact on Front-end
Go to your website.
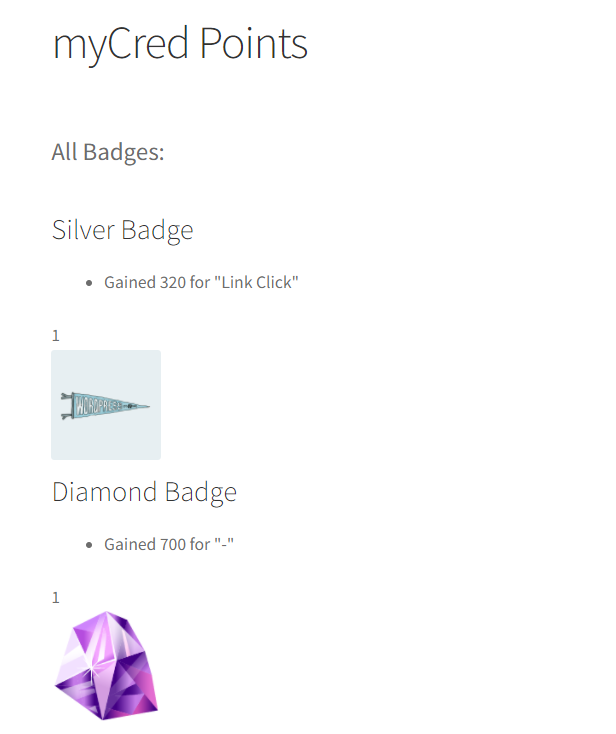
Imported User Badges of all the users are displayed on your page.
Ranks
Note: Ranks Behaviour should be set on Manual Mode to assign ranks.
If the admin wants to import the User Ranks data from another website or manually assign the ranks to the users using the CSV file, select the Ranks from the tabs in the Tools →Import/Export section.
This section contains an Import section from where the admin can download the raw-template.csv file and add the respective user rank data in the given fields without changing the headers, then this newly edited file can be imported to another site. The Admin can export the User Rank data from one website and import it to another, but in this case, the admin has to check and edit the User IDs and Rank data in the file so that the ranks can be assigned to the respective users.
Download Raw Template
Note: Do not change the headers in the CSV file.
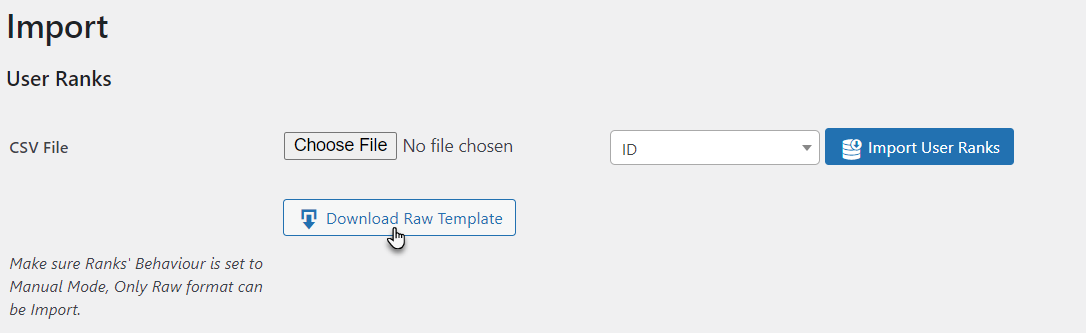
If the admin wants to assign ranks to the users, first go to the import section and download the raw template.
Click on the Download Raw Template button.
The raw CSV template file will start downloading.
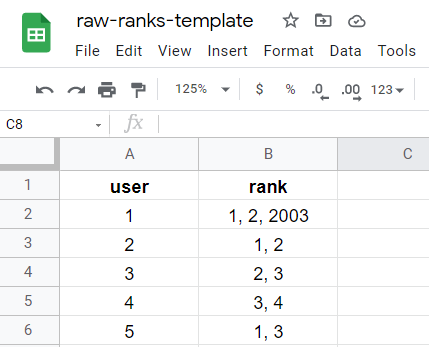
Locate the raw-ranks-template.csv in your local storage.
Open the template file.
Edit the template file and add user data.
Enter User ID in the user column.
Enter Rank ID in the rank column.
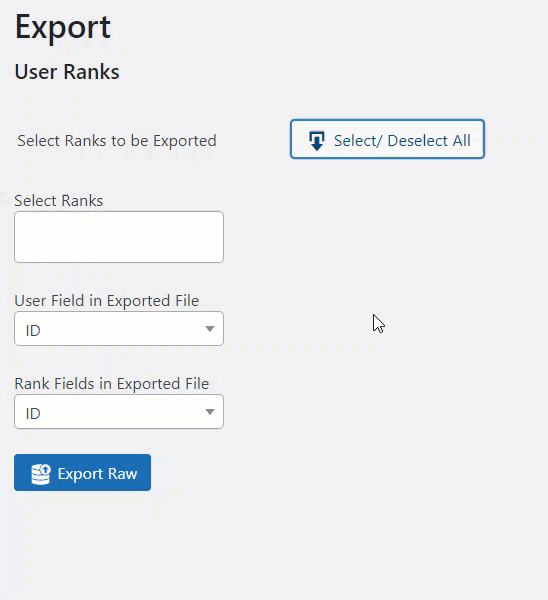
Export User Ranks
Export Raw Template
If you want to export the User Rank Data from one website to another.
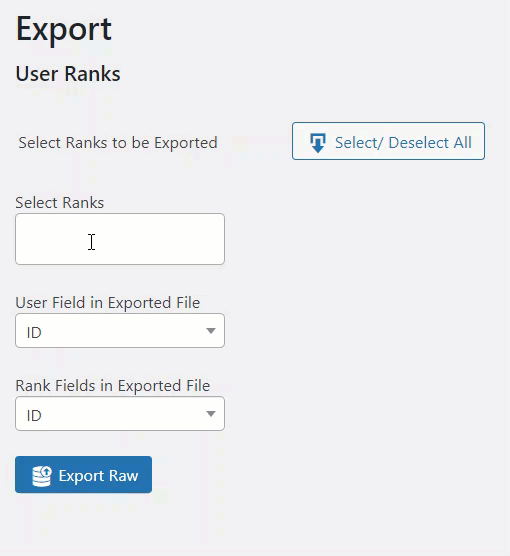
Go to the Export section.
Click on the Select/Deselect All button to select or deselect all the Ranks.
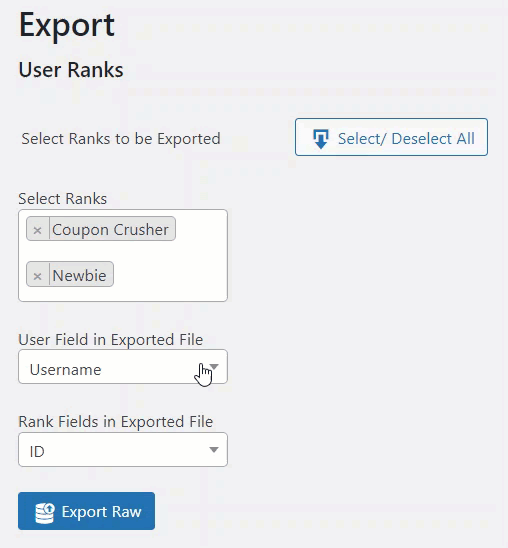
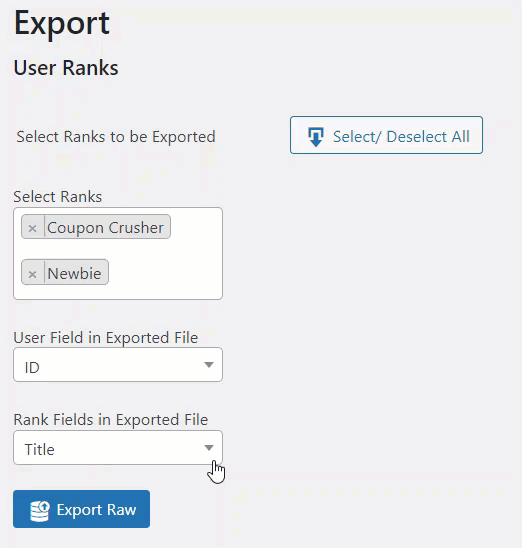
Or select a specific rank from the Select Ranks.
Select the User Field which you want in your exported file, this user field can be a User ID, User Name, or User Email.
The admin can also select the Rank Field for the export raw file, this rank field can be a Rank ID, Title, or Slug.
Click on the Export Raw button.
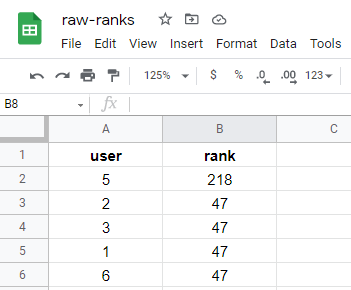
The raw-ranks.csv file will start downloading.
Once the file is downloaded, locate the file and open it.
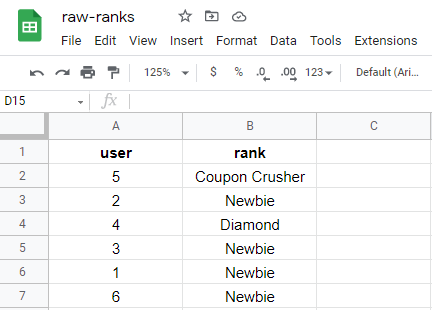
The raw-ranks file with all the User Ranks data along with User ID and Rank Title fields.
Import Ranks Data
Back-end Configuration
Note: Please import the edited raw-ranks file in the CSV format only else it will not work properly.
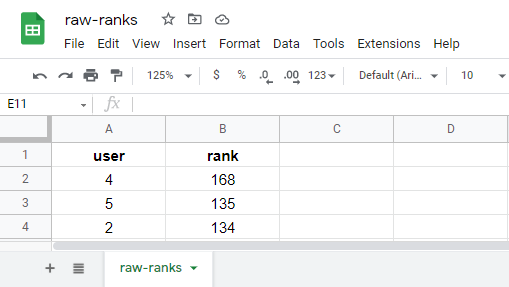
Firstly, check the User ID of the users from WordPress Admin Dashboard → Users and the Rank ID of the ranks from WordPress Admin Dashboard → Points → Ranks on your new website.
Now, open your raw-badges.csv file and edit the User ID of the users and Rank ID of the ranks in the user and rank column that you want to assign for your new website.
Or you can also edit the file and use the User Name or User Email and Rank Title or Rank Slug in the user and rank column.
Go to your second website where you want to import User Rank data.
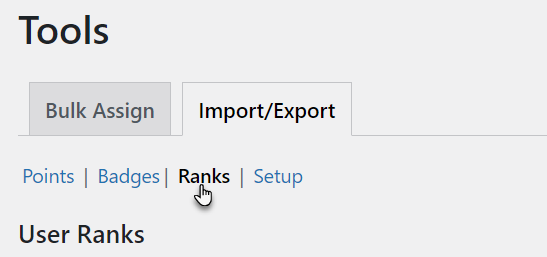
Navigate to the WordPress Admin Dashboard → myCred → Tools.
Select Import/Export from the tab.
Click on the Ranks tab.
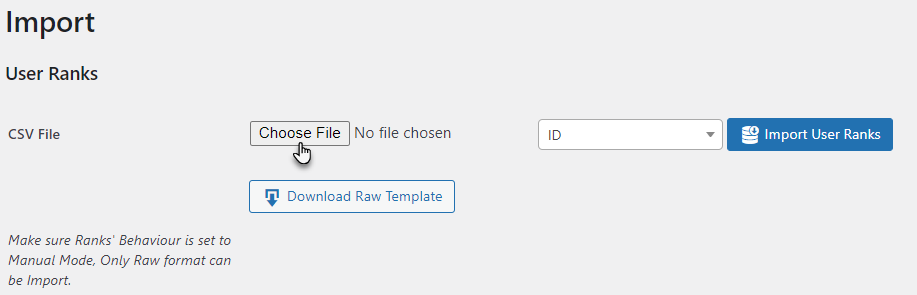
In the import section, click on the Choose File button and select the raw-rank.csv from your local storage.
Select the Rank Field that your file contains from the drop down menu, in this case, our file contains Rank ID, so we will select ID.
Click on the Import User Ranks button.
A confirmation message will be displayed, this shows the number of affected rows.
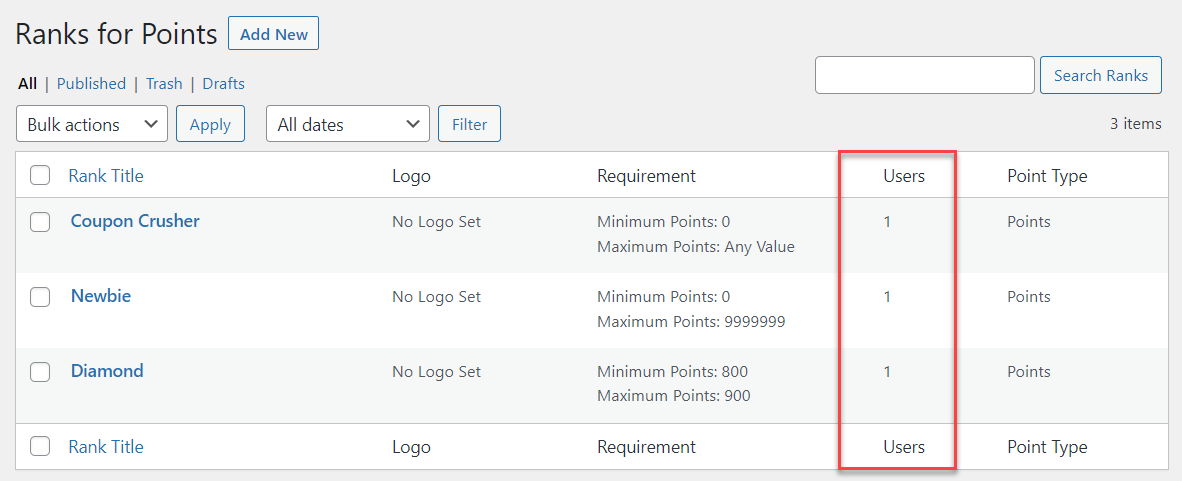
Ranks are now assigned to the users.
To review the rank, navigate to the WordPress Admin Dashboard → Points → Ranks.
The ranks that are assigned to the respective number of users are displayed in the ranks table.
Impact on Front-end
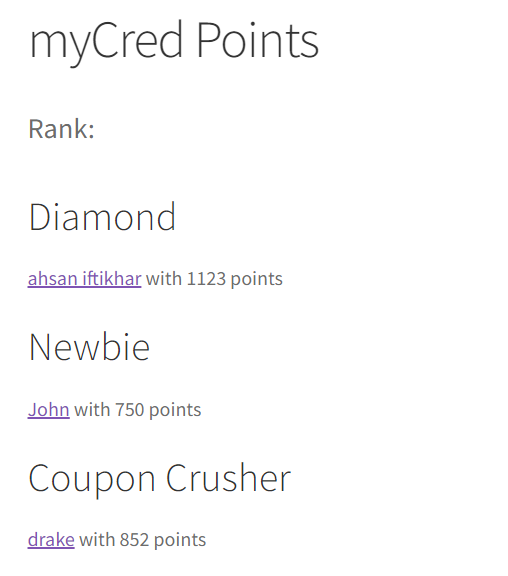
Go to your website.
Imported User Ranks of all the users are displayed on your page.