The Multiple Point Type gateway feature allows the admin to set up a point type gateway for each individual point type.
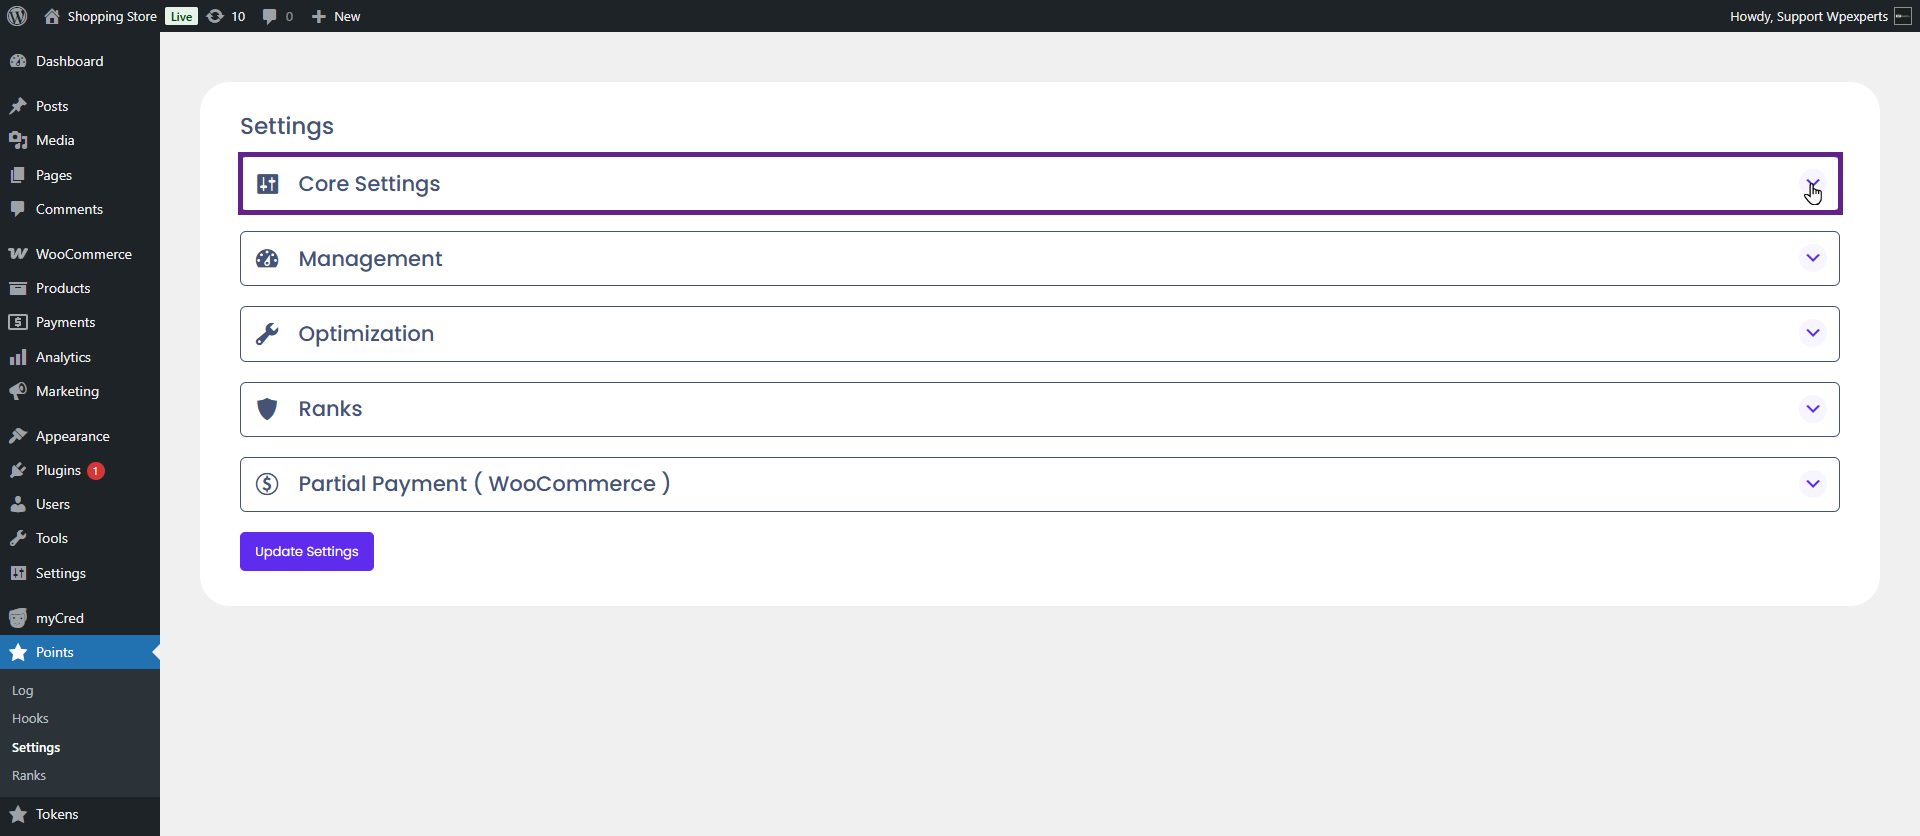
Back-End Settings
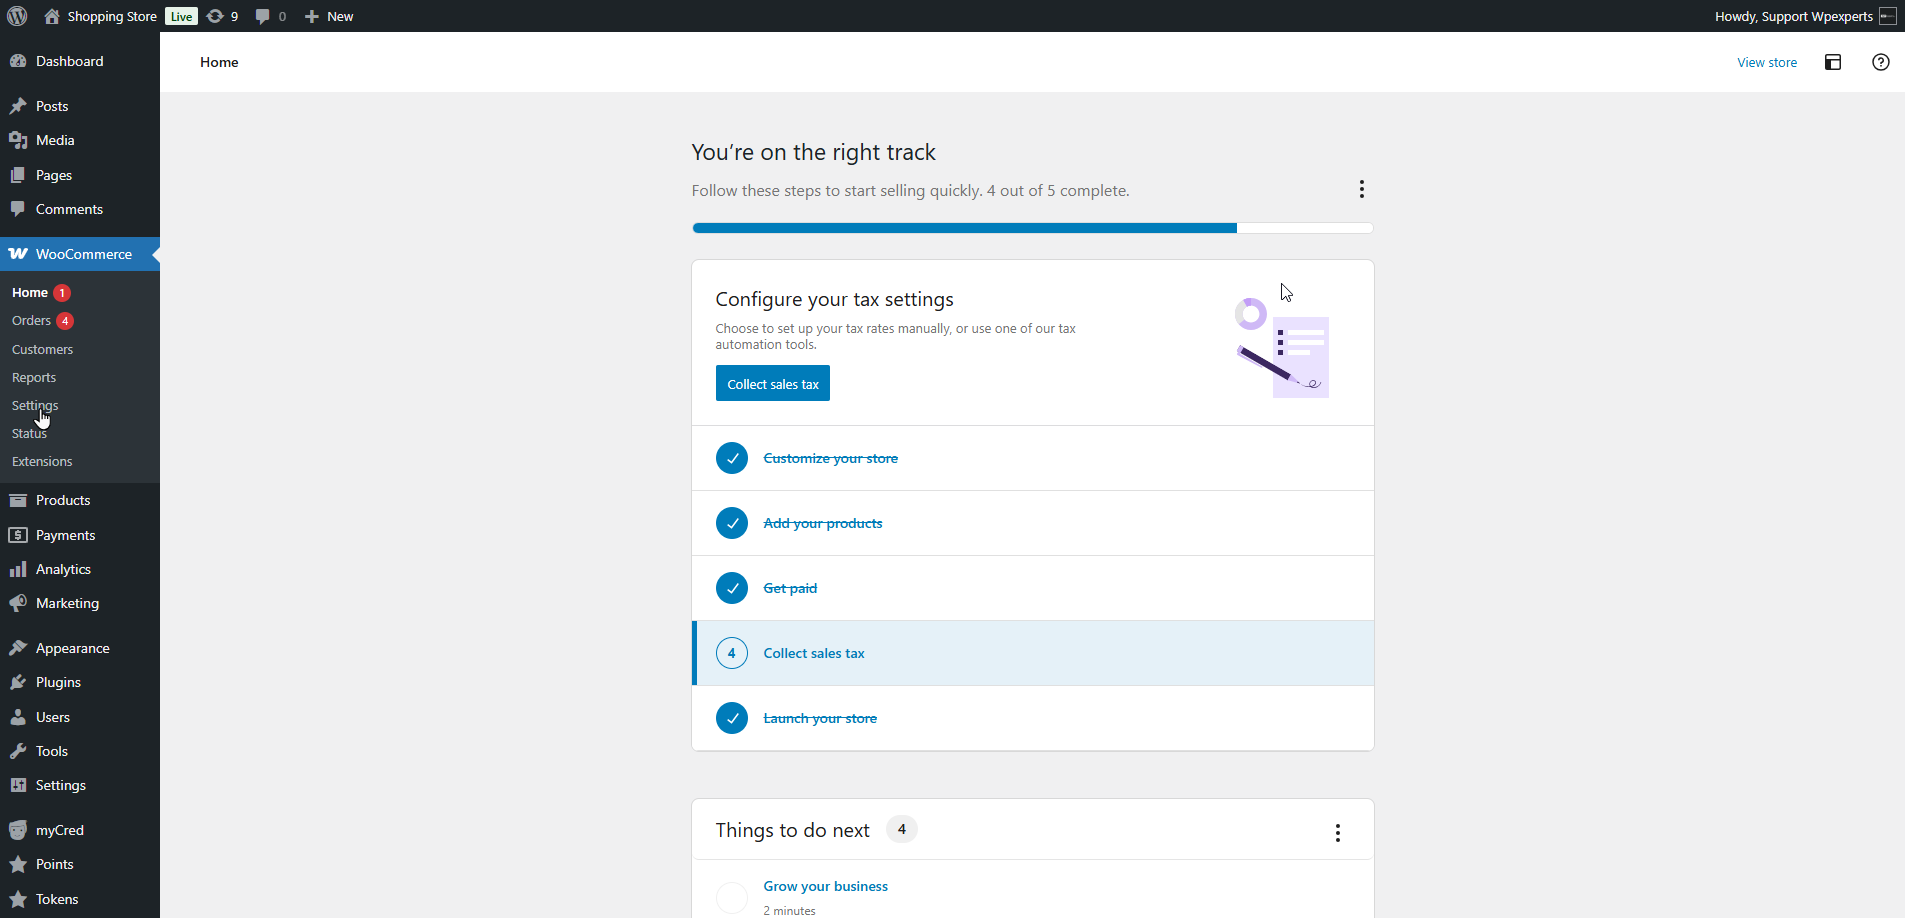
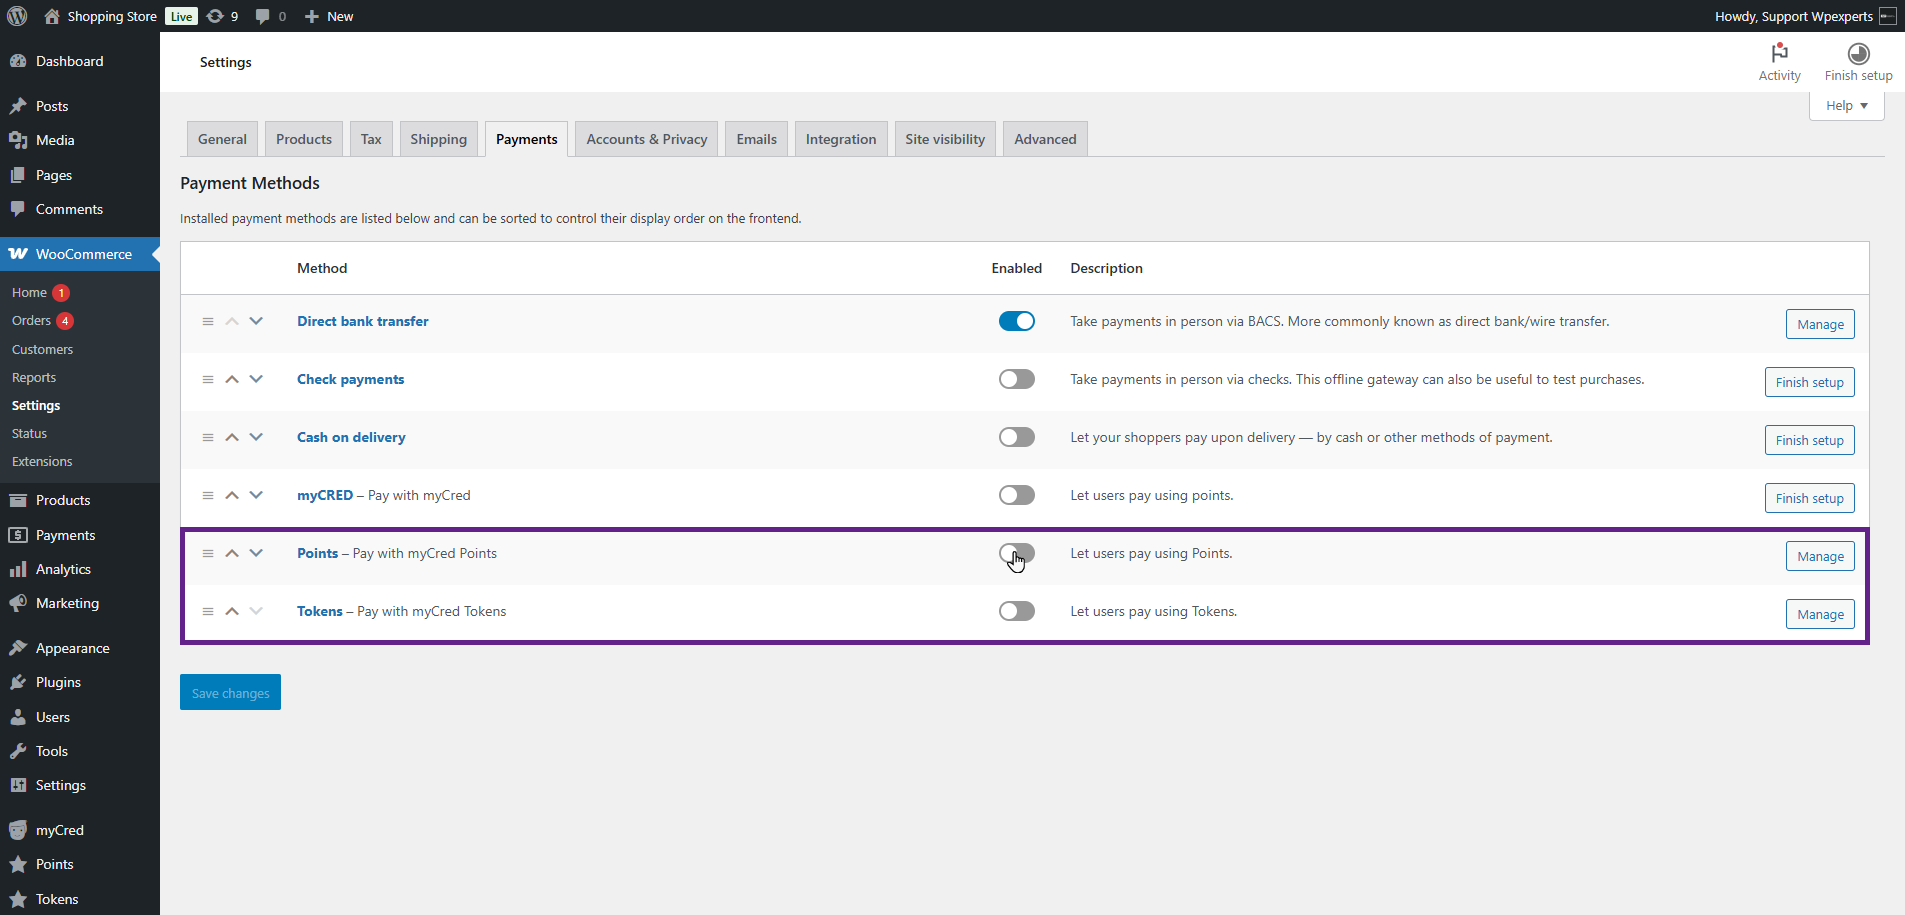
Go to the Admin Dashboard > WooCoomerce > Settings.
Next, navigate to the Payments tab.
In the Payments tab, activate the toggle button for the desired point type gateway.
Note: Both the default and custom point types will be available as a gateway.
Once done, click the Save Changes button.
Front-End Impact
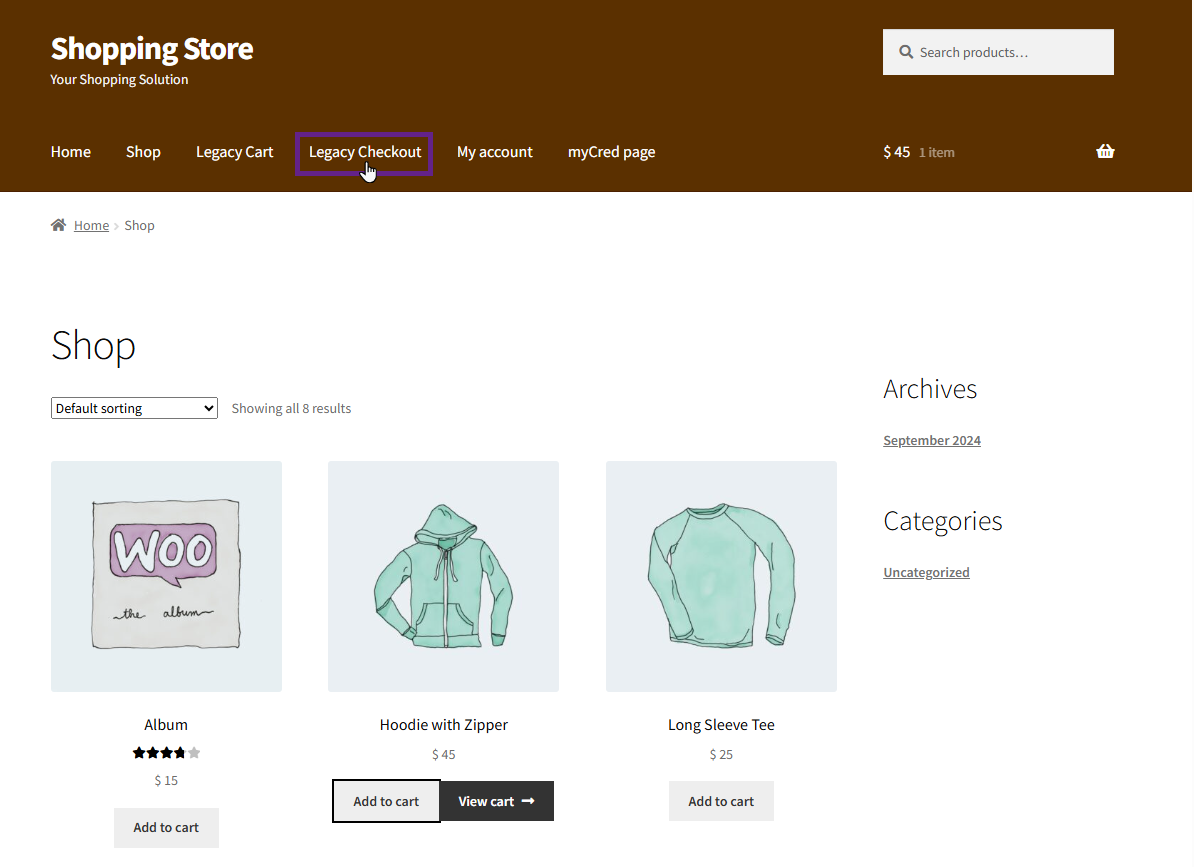
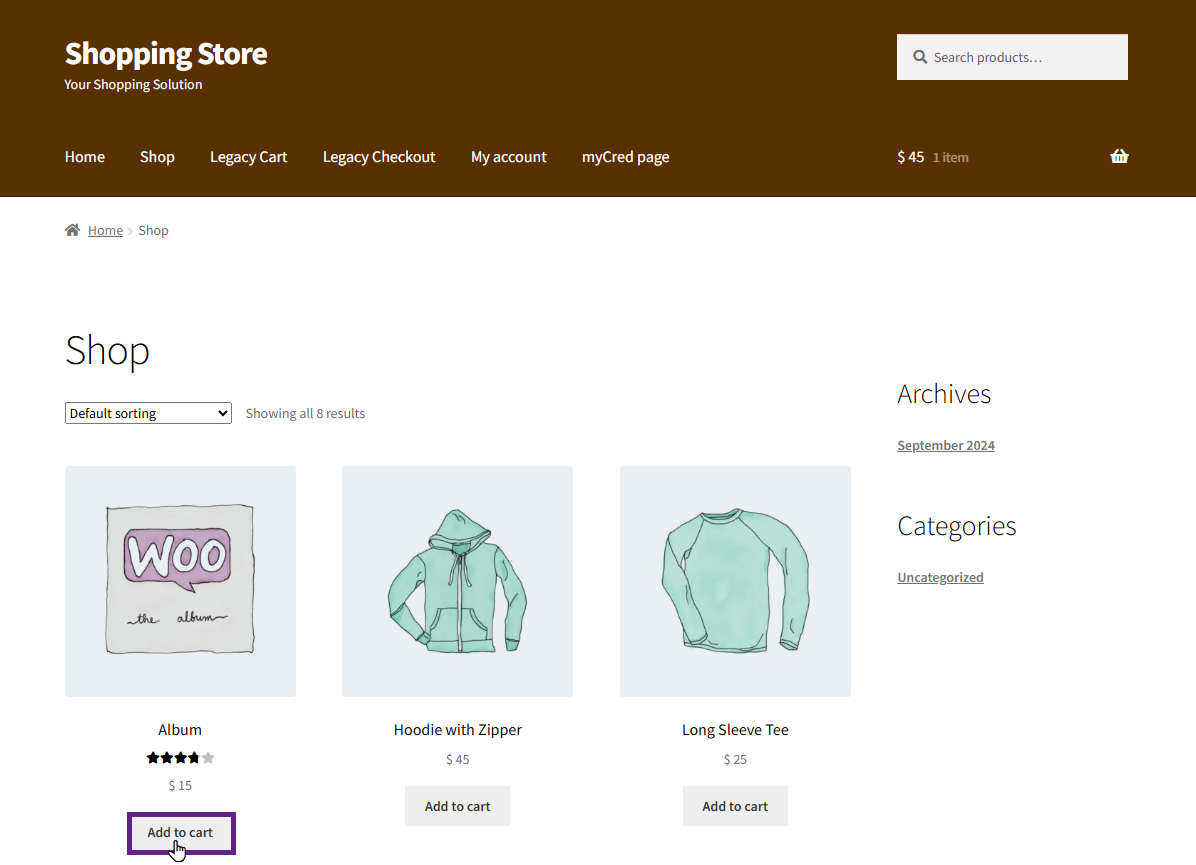
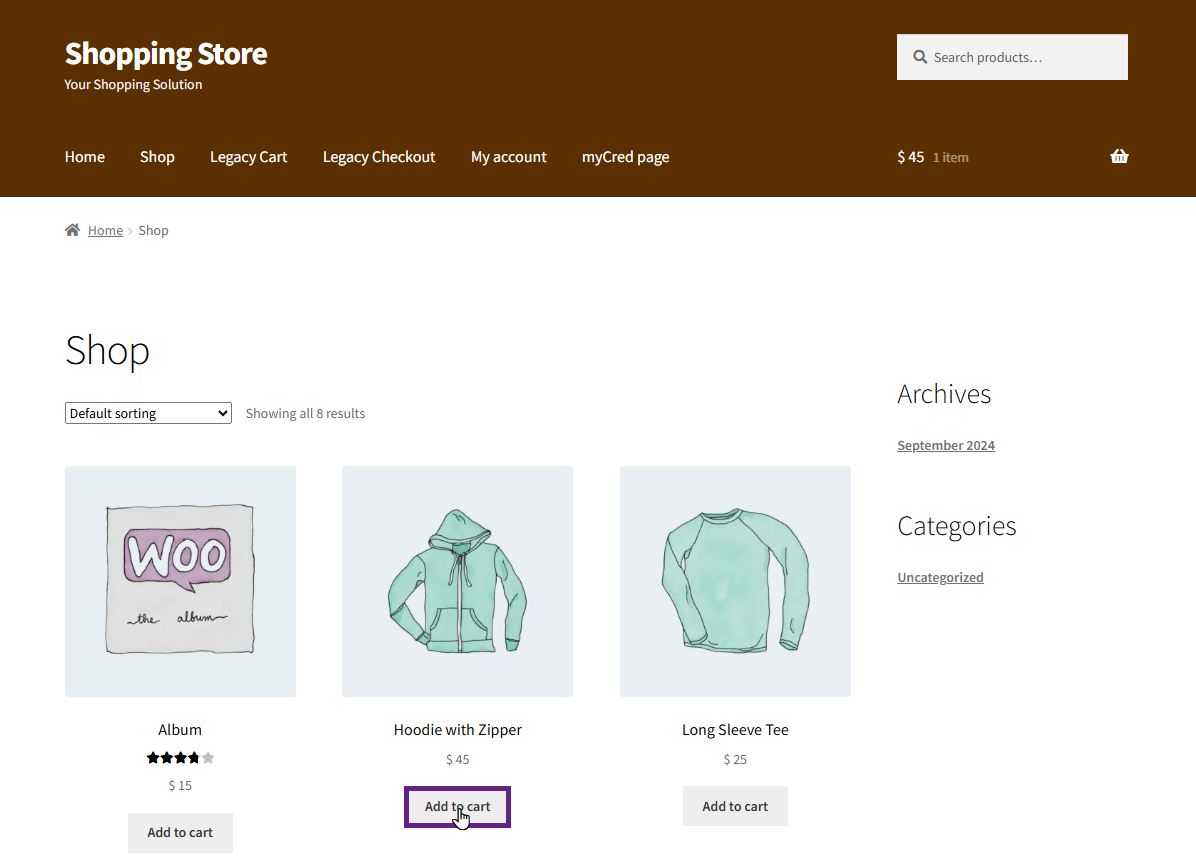
Go to the website.
Navigate to the Shop page and add the product to the cart.
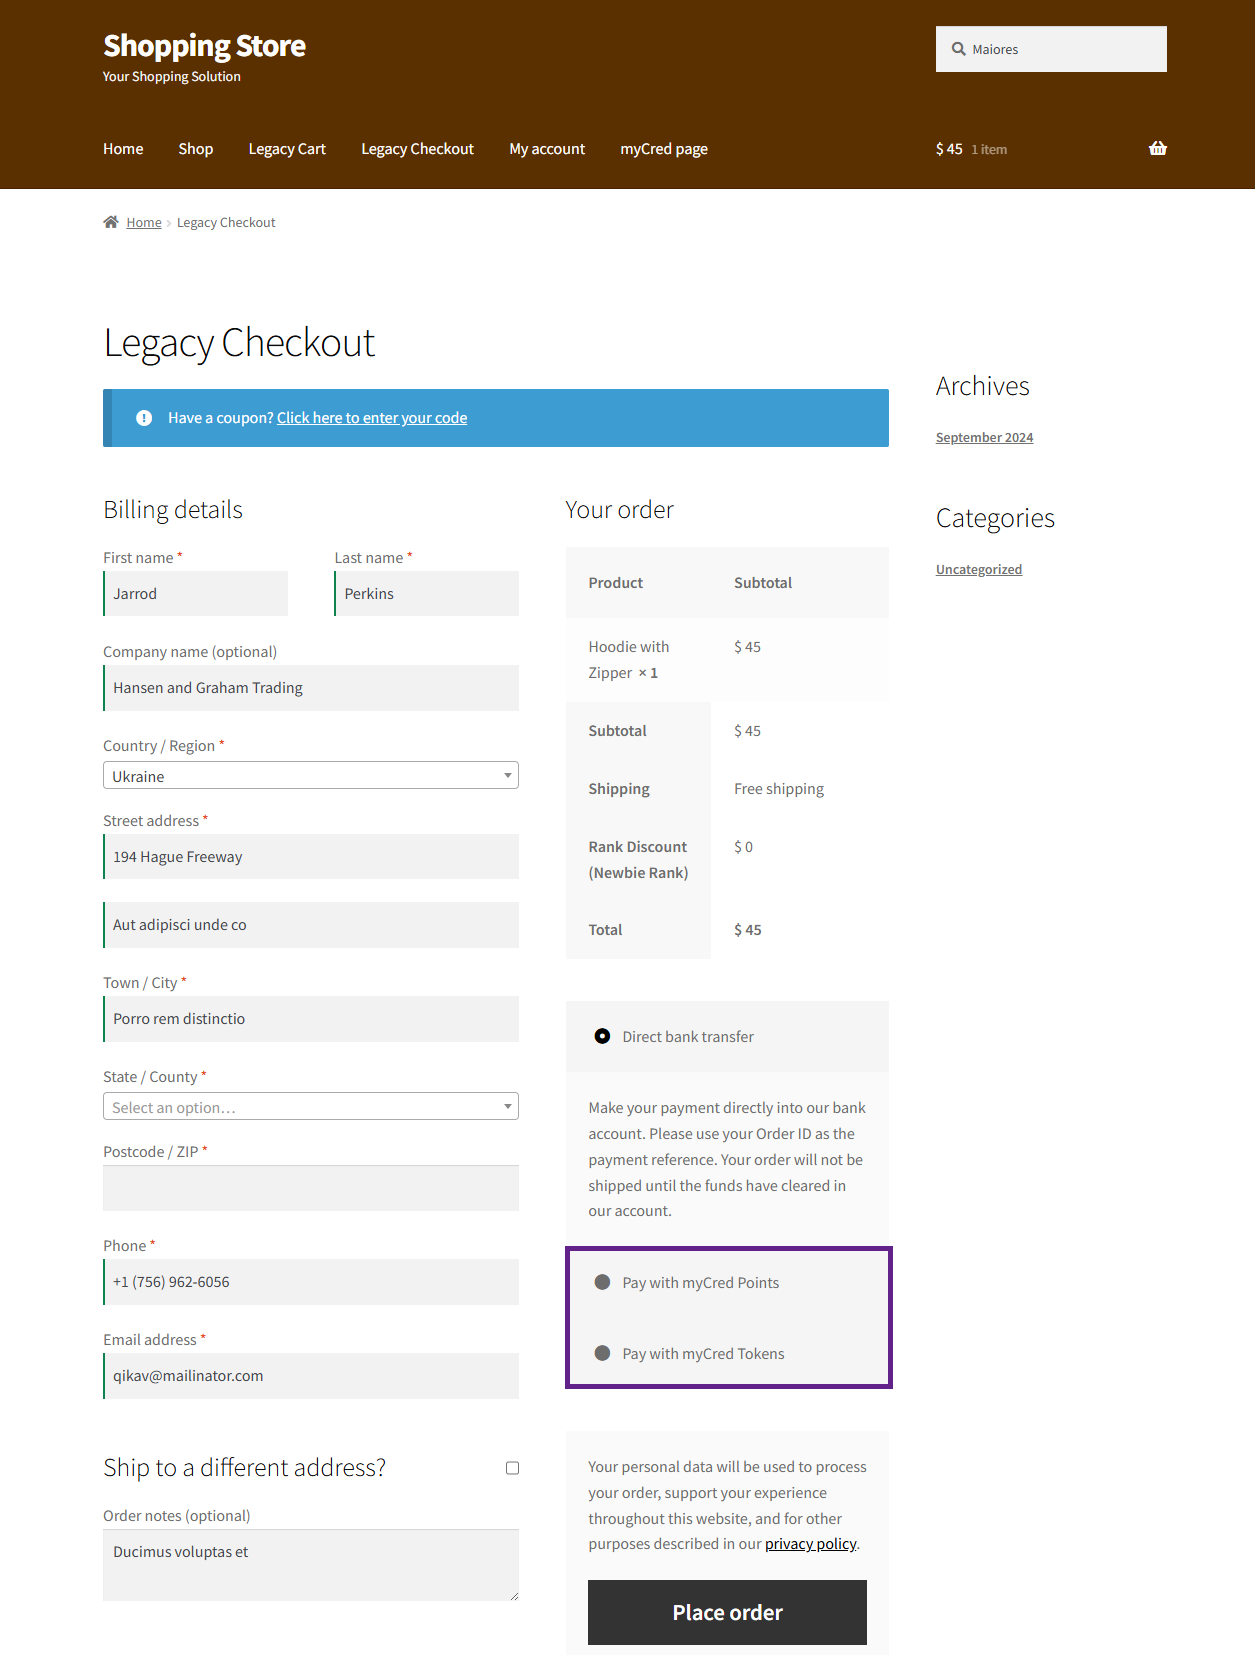
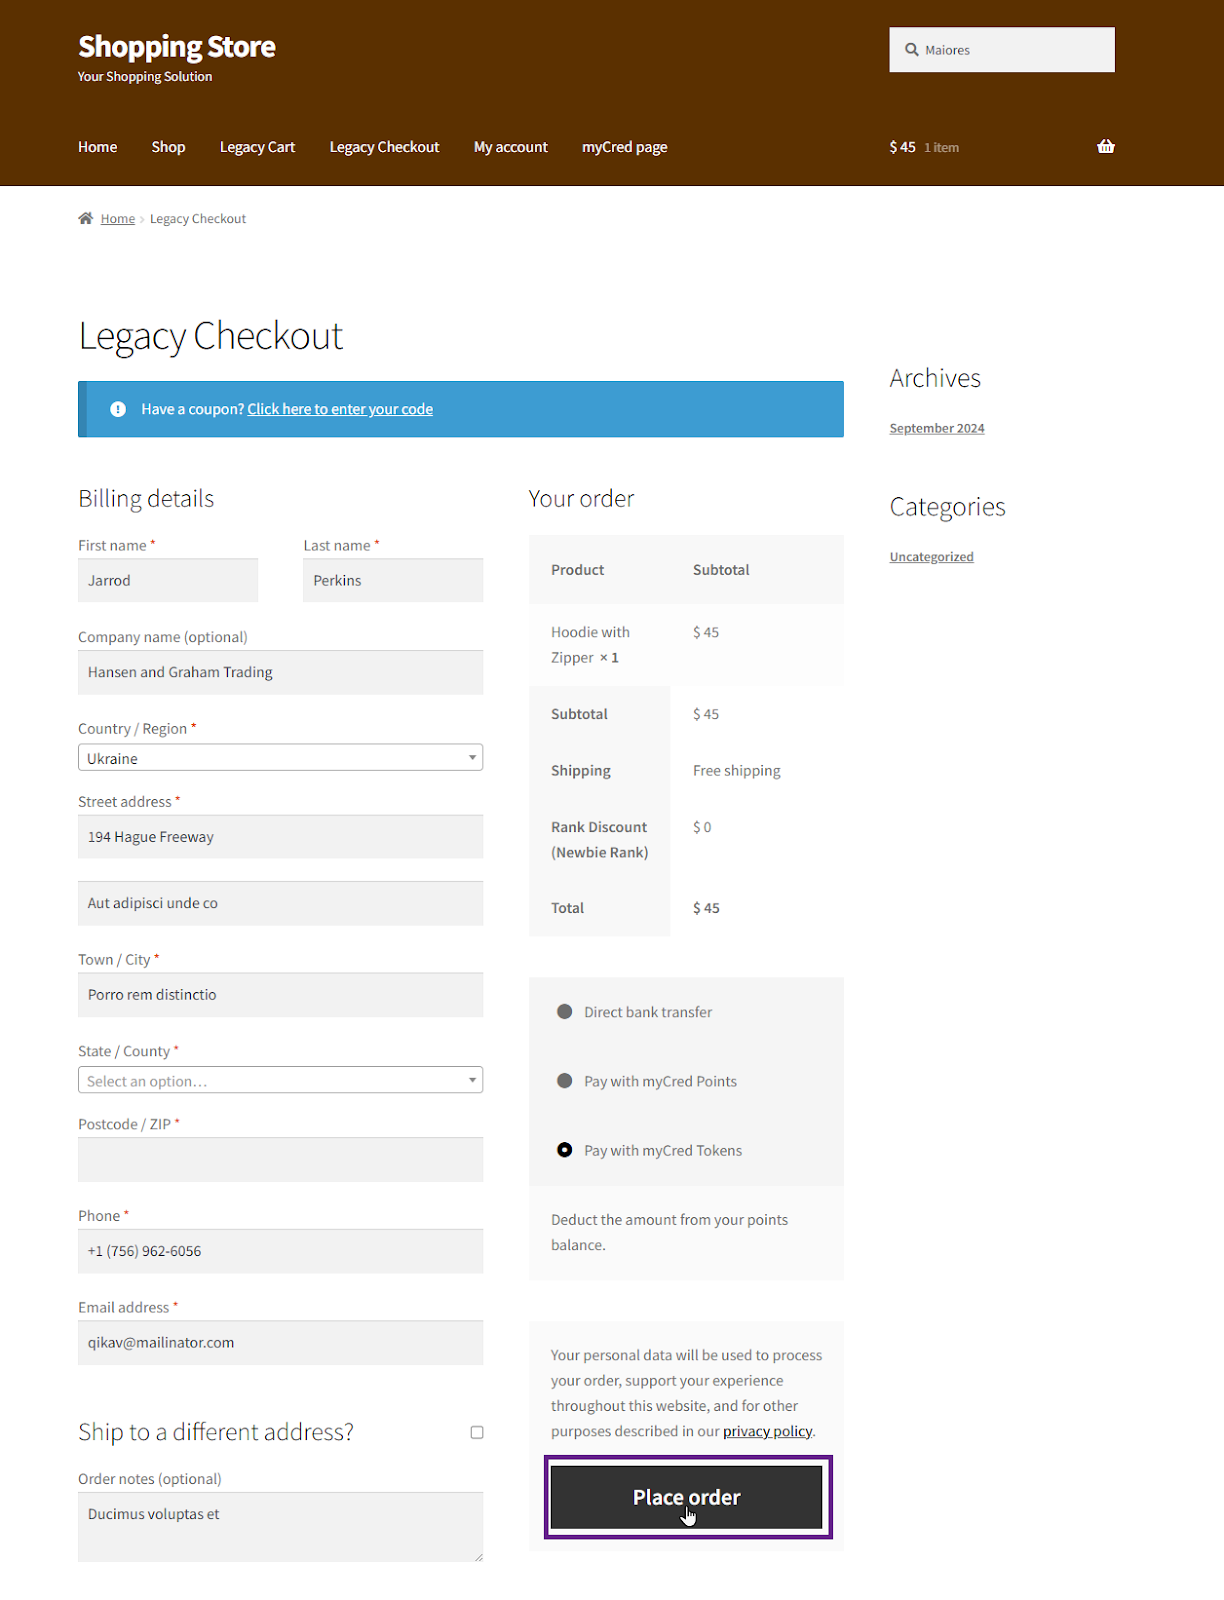
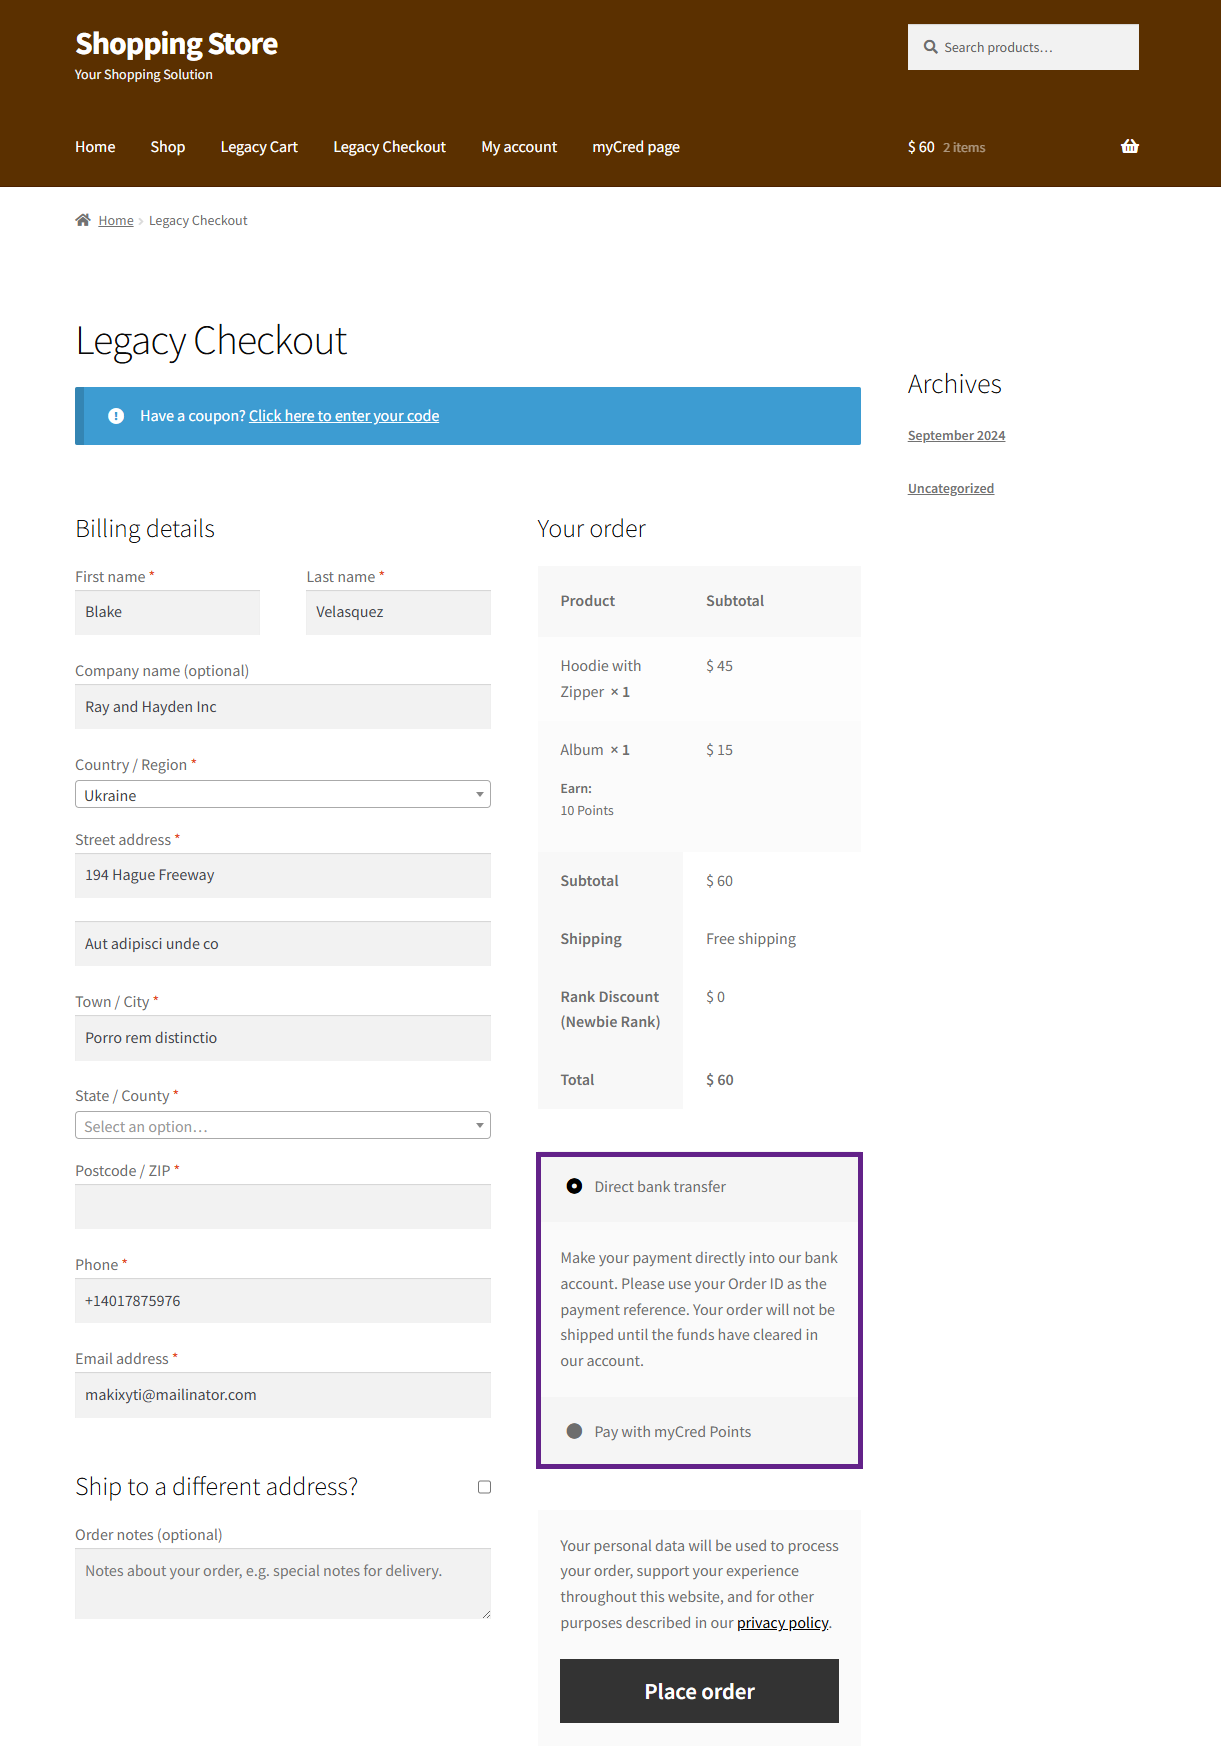
Next, navigate to the Checkout page.
As you can see, the user can utilize multiple point types as a gateway.
Now, choose your preferred payment gateway and complete the order.
Gateway Restrictions
The Gateway restriction feature allows the admin to restrict point-type gateways based on products, categories, or tags. If a restriction is applied—for example, on specific products—users cannot use the point-type gateway for those particular products.
Back-End Settings
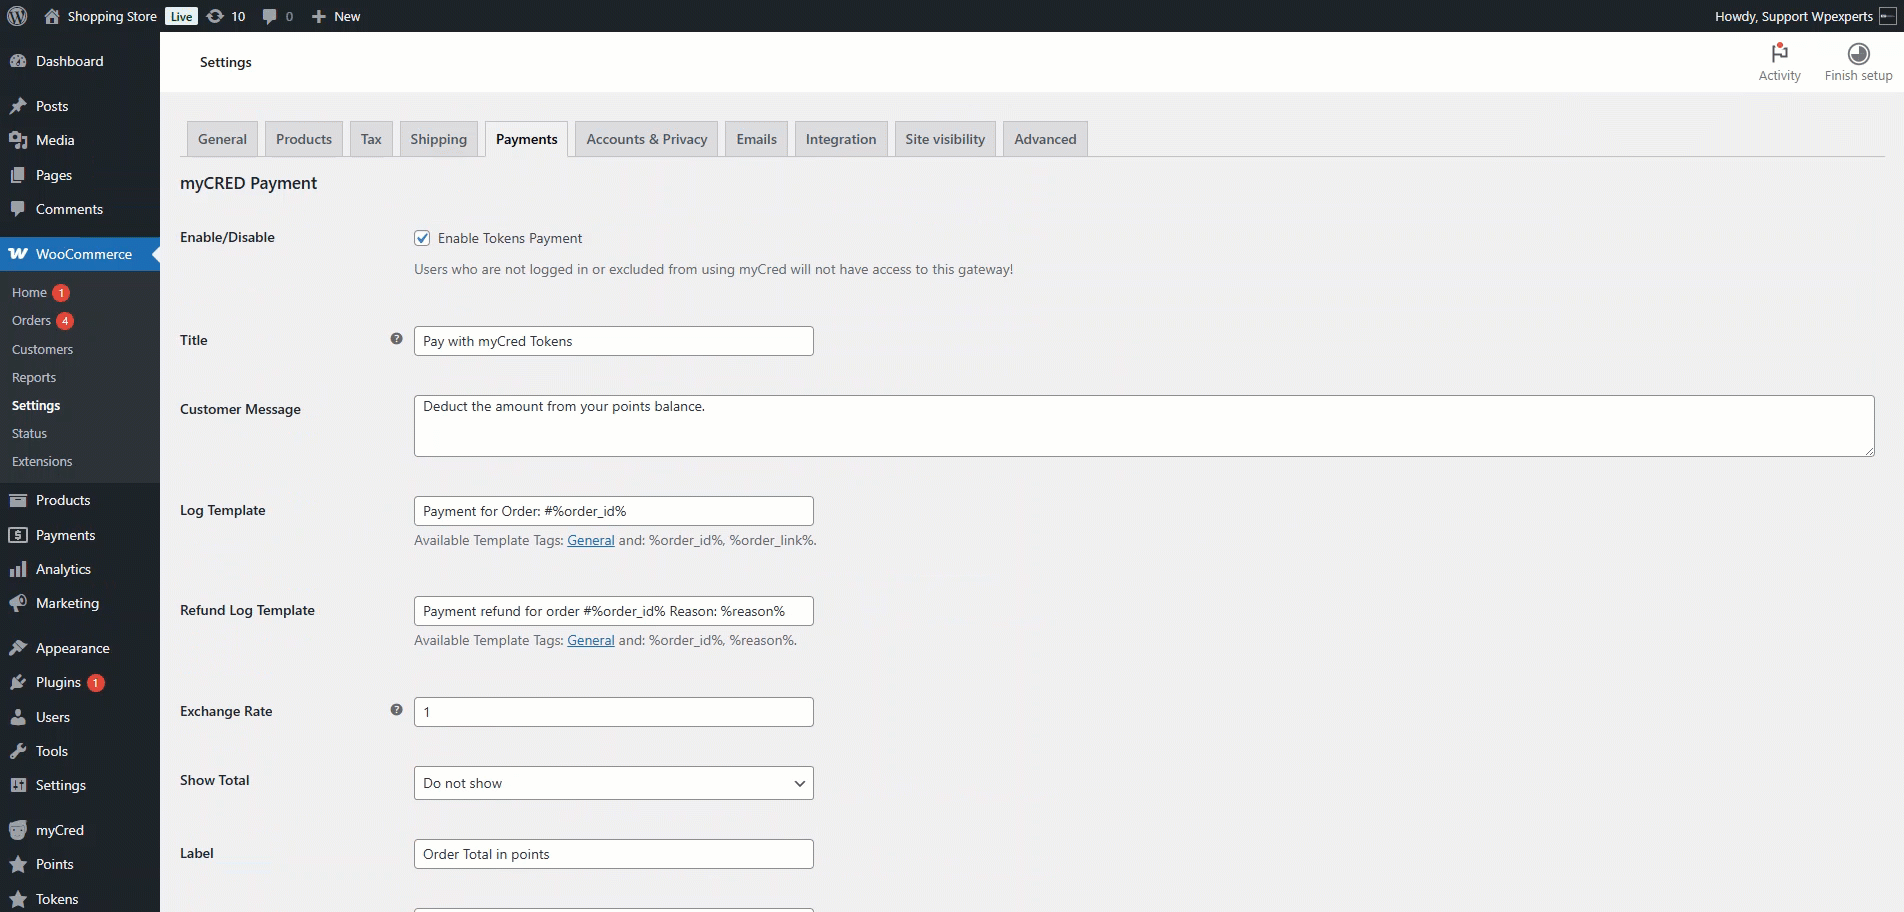
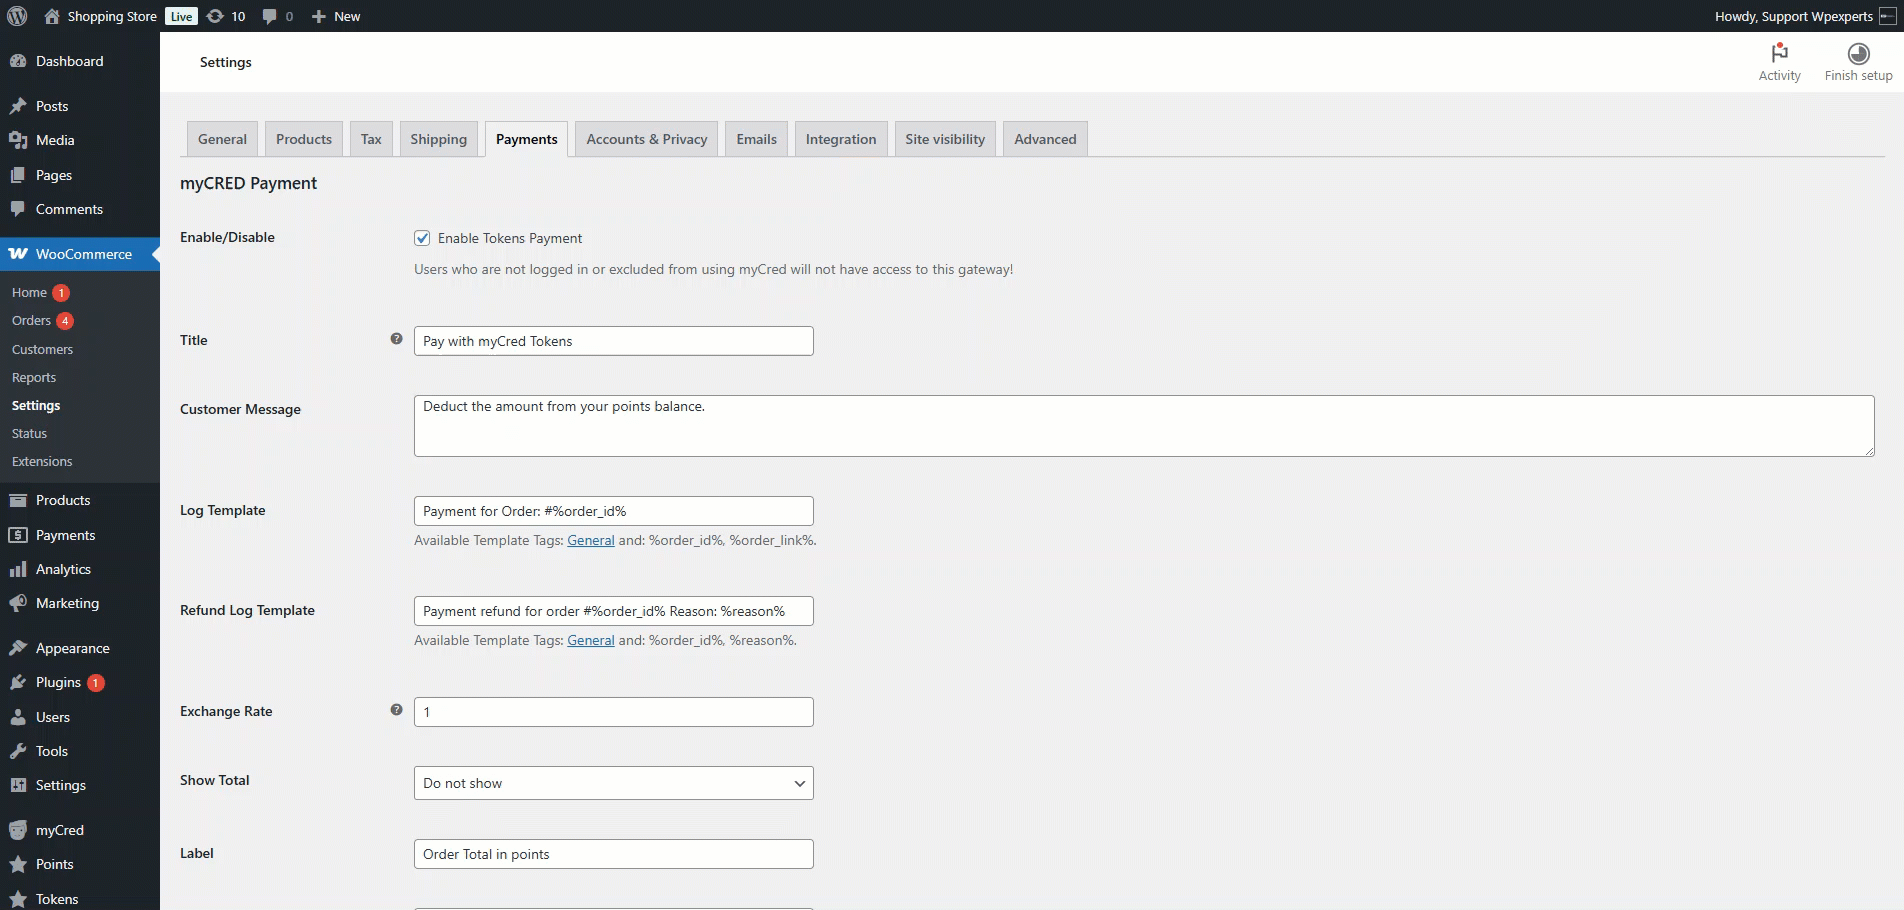
Go to the Admin Dashboard > WooCoomerce > Settings.
Next, navigate to the Payments tab.
Click the Manage button for the point type you prefer.
Product Restriction
Add your preferred products to the Product Restriction list. Once done, click the Save Changes button.
Category Restriction
Add your preferred product categories to the Category Restriction list. Once done, click the Save Changes button.
Tag Restriction
Add your preferred tags to the Tag Restriction list. Once done, click the Save Changes button.
Front-End Impact
Go to the website.
Navigate to the Shop page.
Product Restriction
Select the product from the Shop page added to the Product Restriction list in the backend.
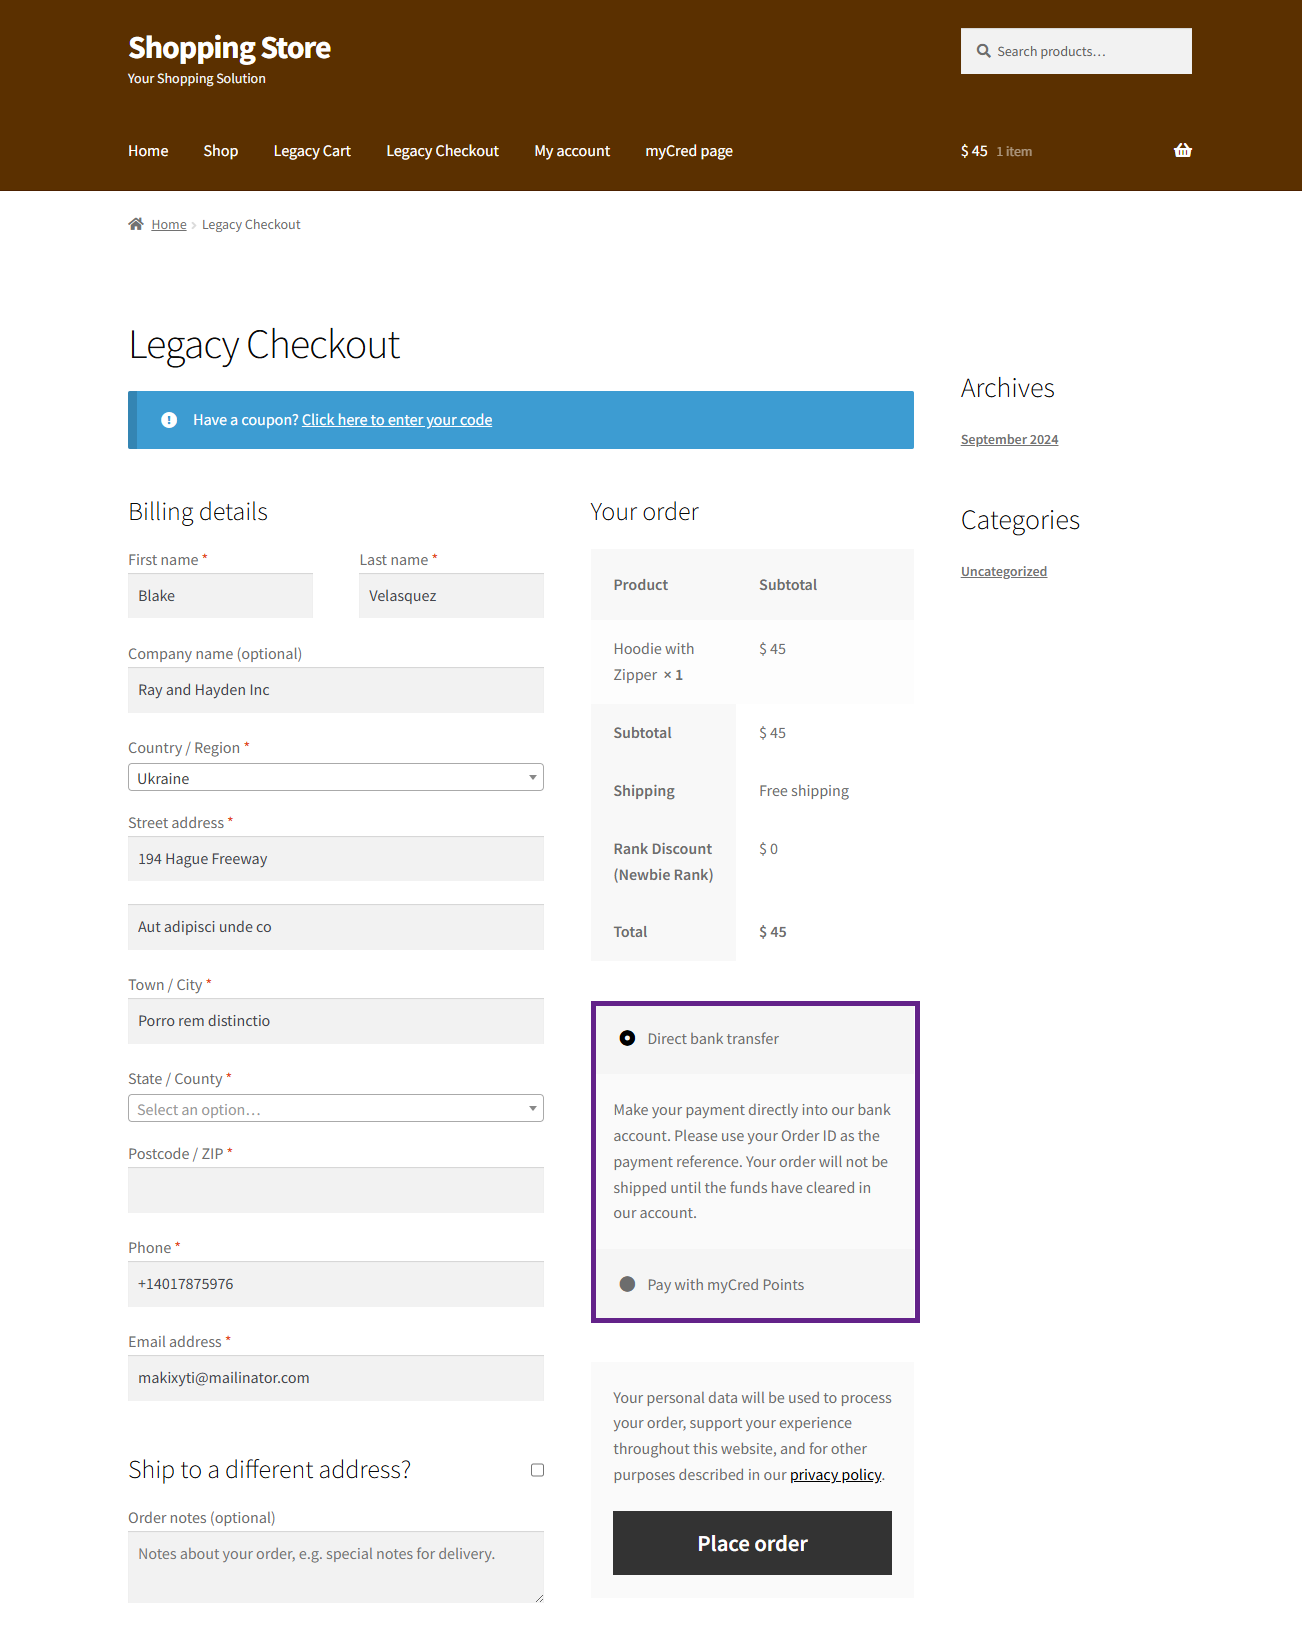
Proceed to the Checkout page.
As you can see, the point type gateway selected in the backend is not available for the product we chose in the backend.
Category Restriction
Select a product from the Shop page that falls in the category selected in the backend
Please Note: In this case, the selected product falls under the Accessories category.
Proceed to the Checkout page.
As you can see, the point type gateway selected in the backend is not available for the product category we selected in the backend.
Tag Restriction
Select a product from the Shop page that contains a tag listed in the Tag Restriction section in the backend.
Please Note: In this case, the selected product falls under the Hoodies tag.
Proceed to the Checkout page.
As you can see, the point type gateway selected in the backend is not available for the product associated with the tag selected in the backend.
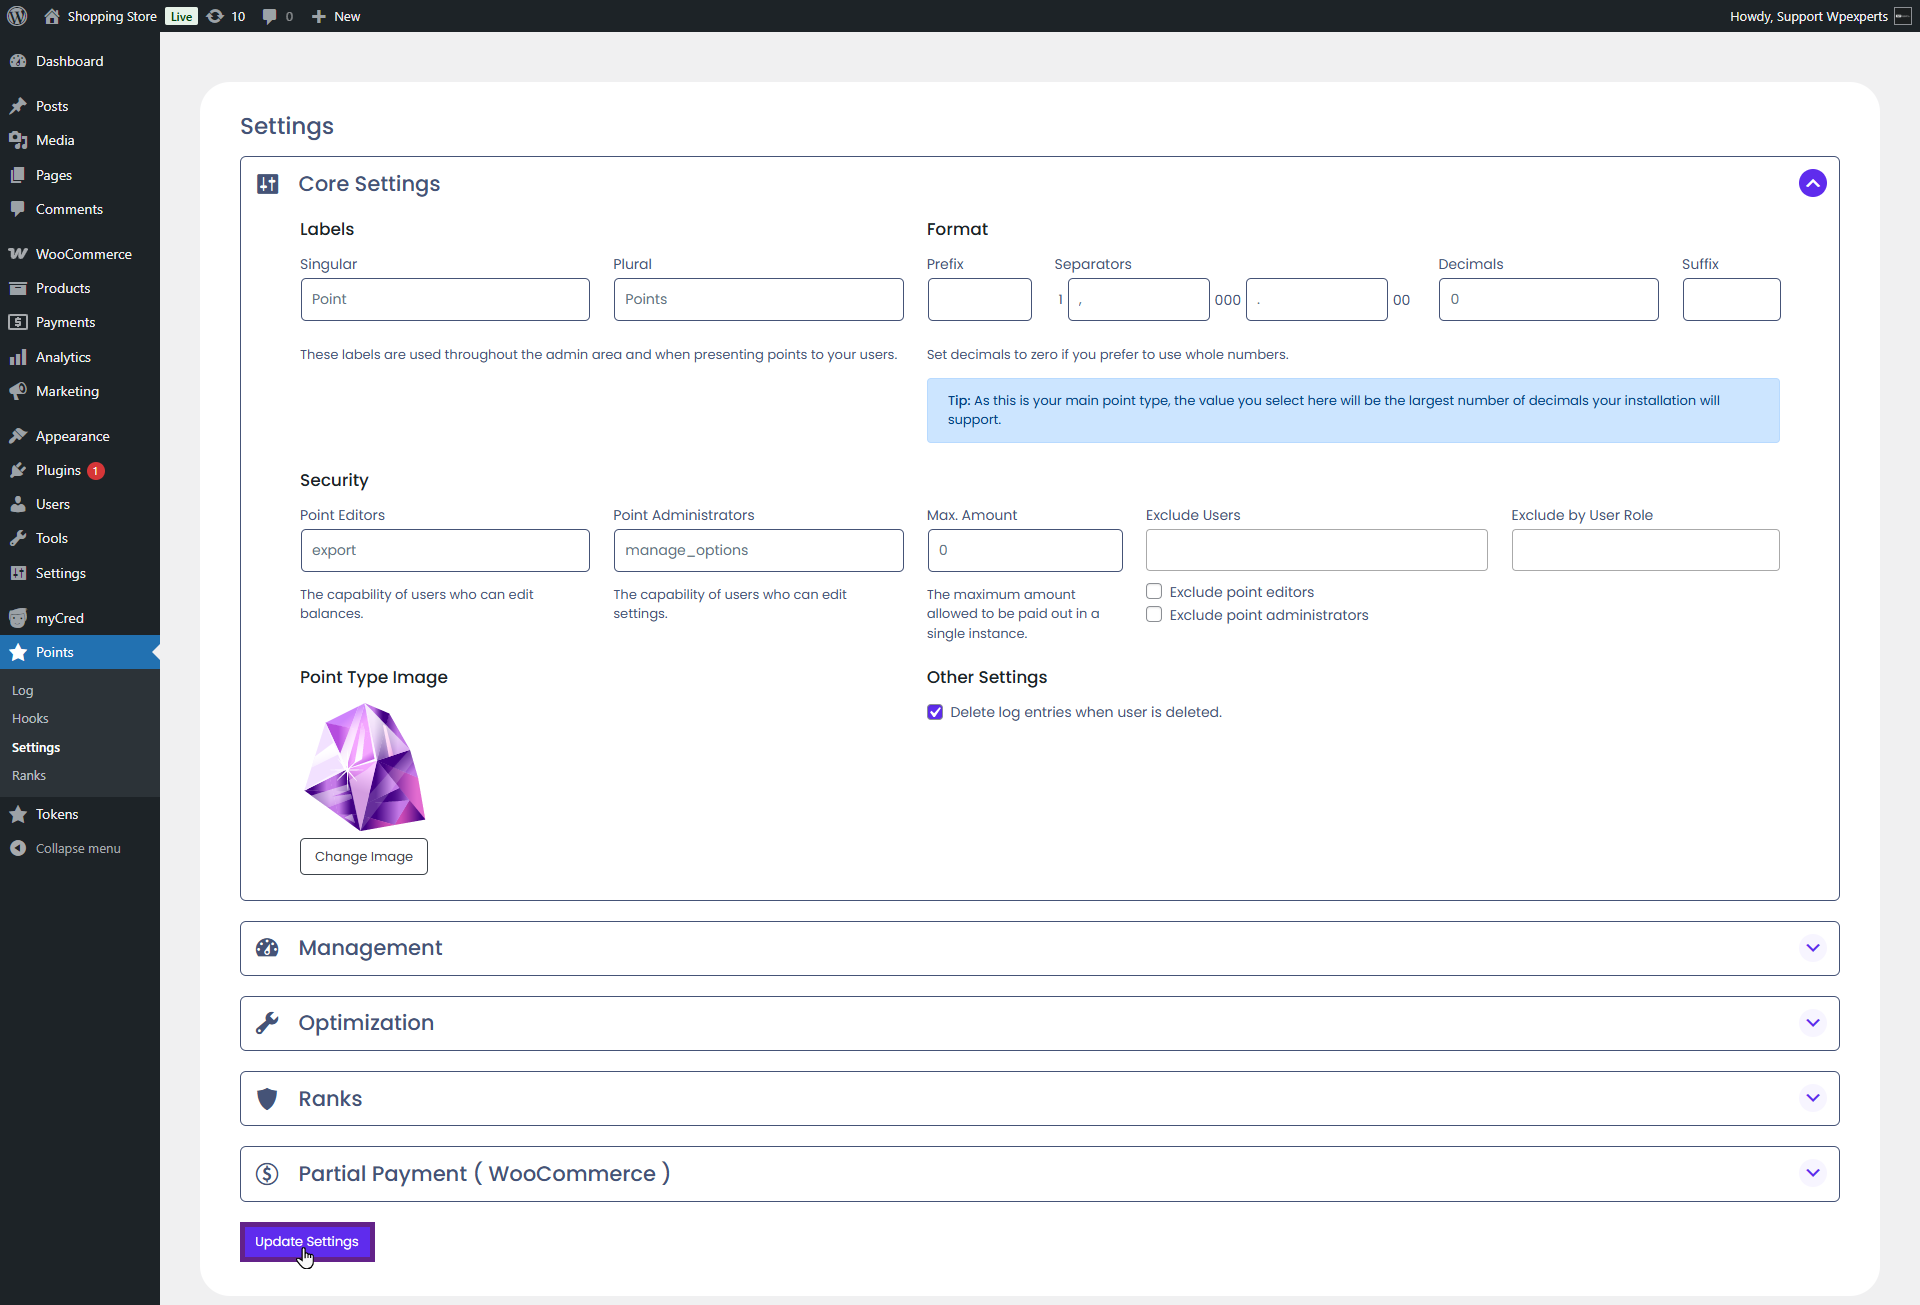
Point Type Image as Gateway Icon
This feature allows the admin to set a point-type image as the gateway icon.
Back-End Settings
Go to the Admin Dashboard > Point Type > Settings.
Next, navigate to the Core Settings section.
Add the point-type image.
Once done, click the Update Settings button.
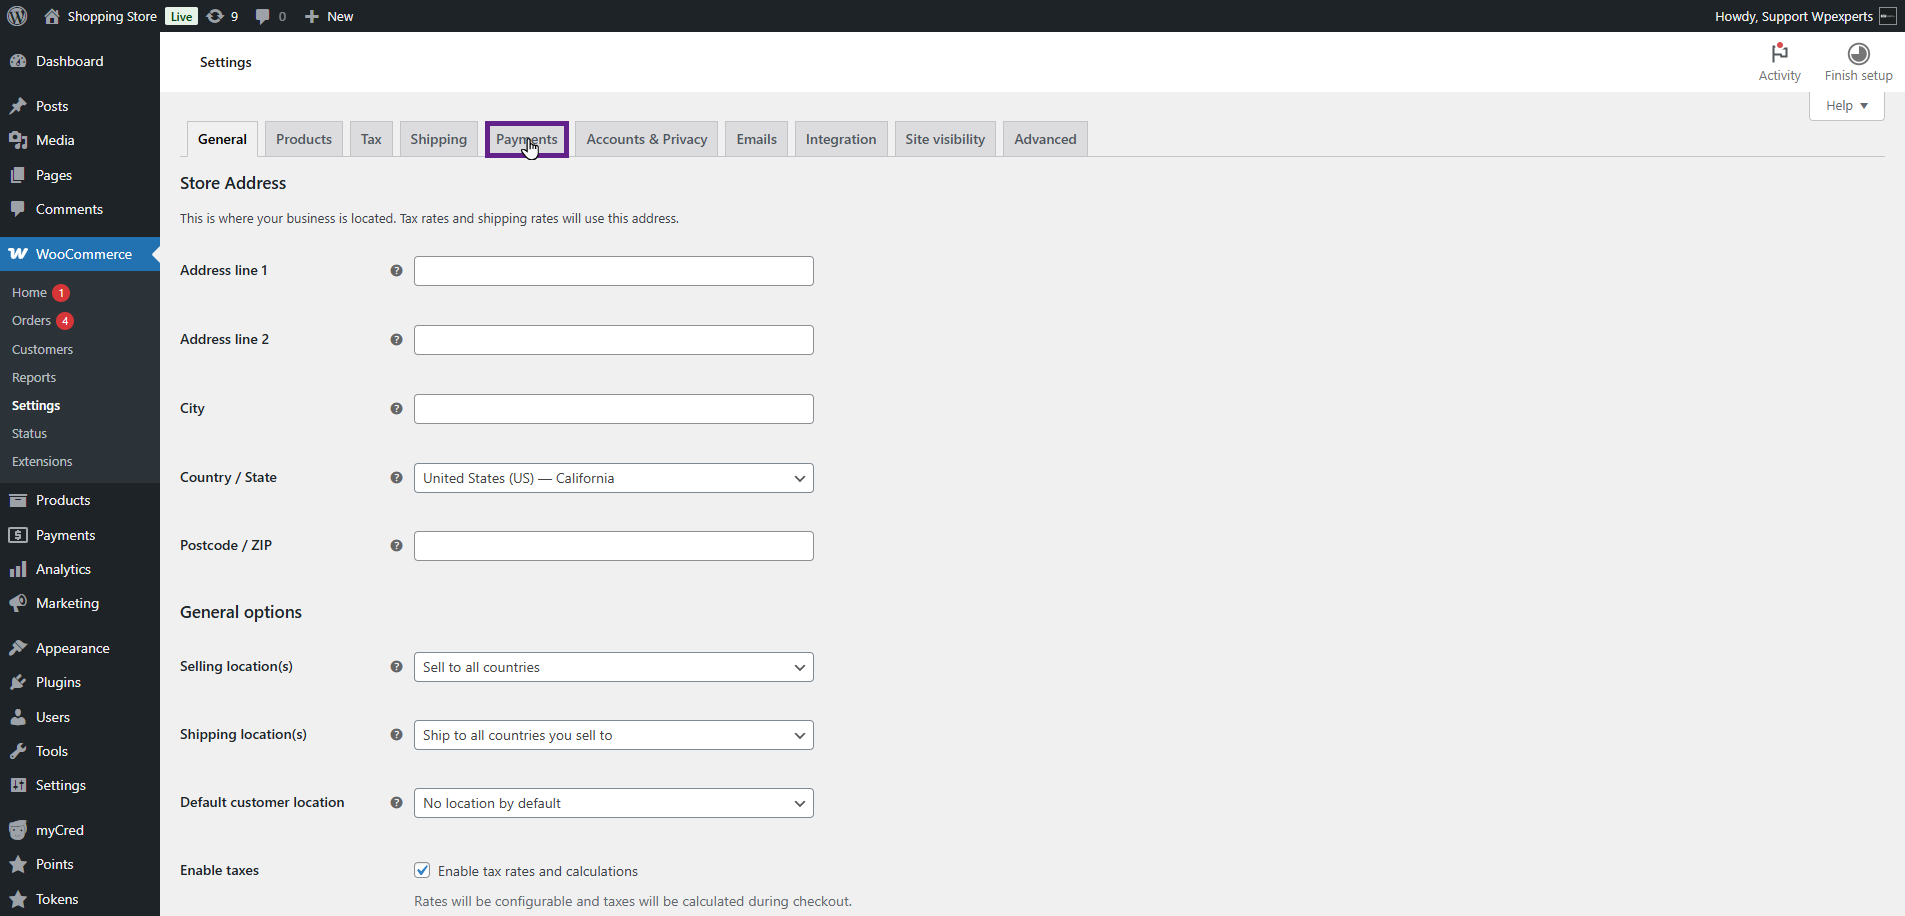
Now, navigate to the Admin Dashboard > WooCommerce > Settings.
Next, navigate to the Payments tab.
As you can see, the point-type image appears as the gateway icon.
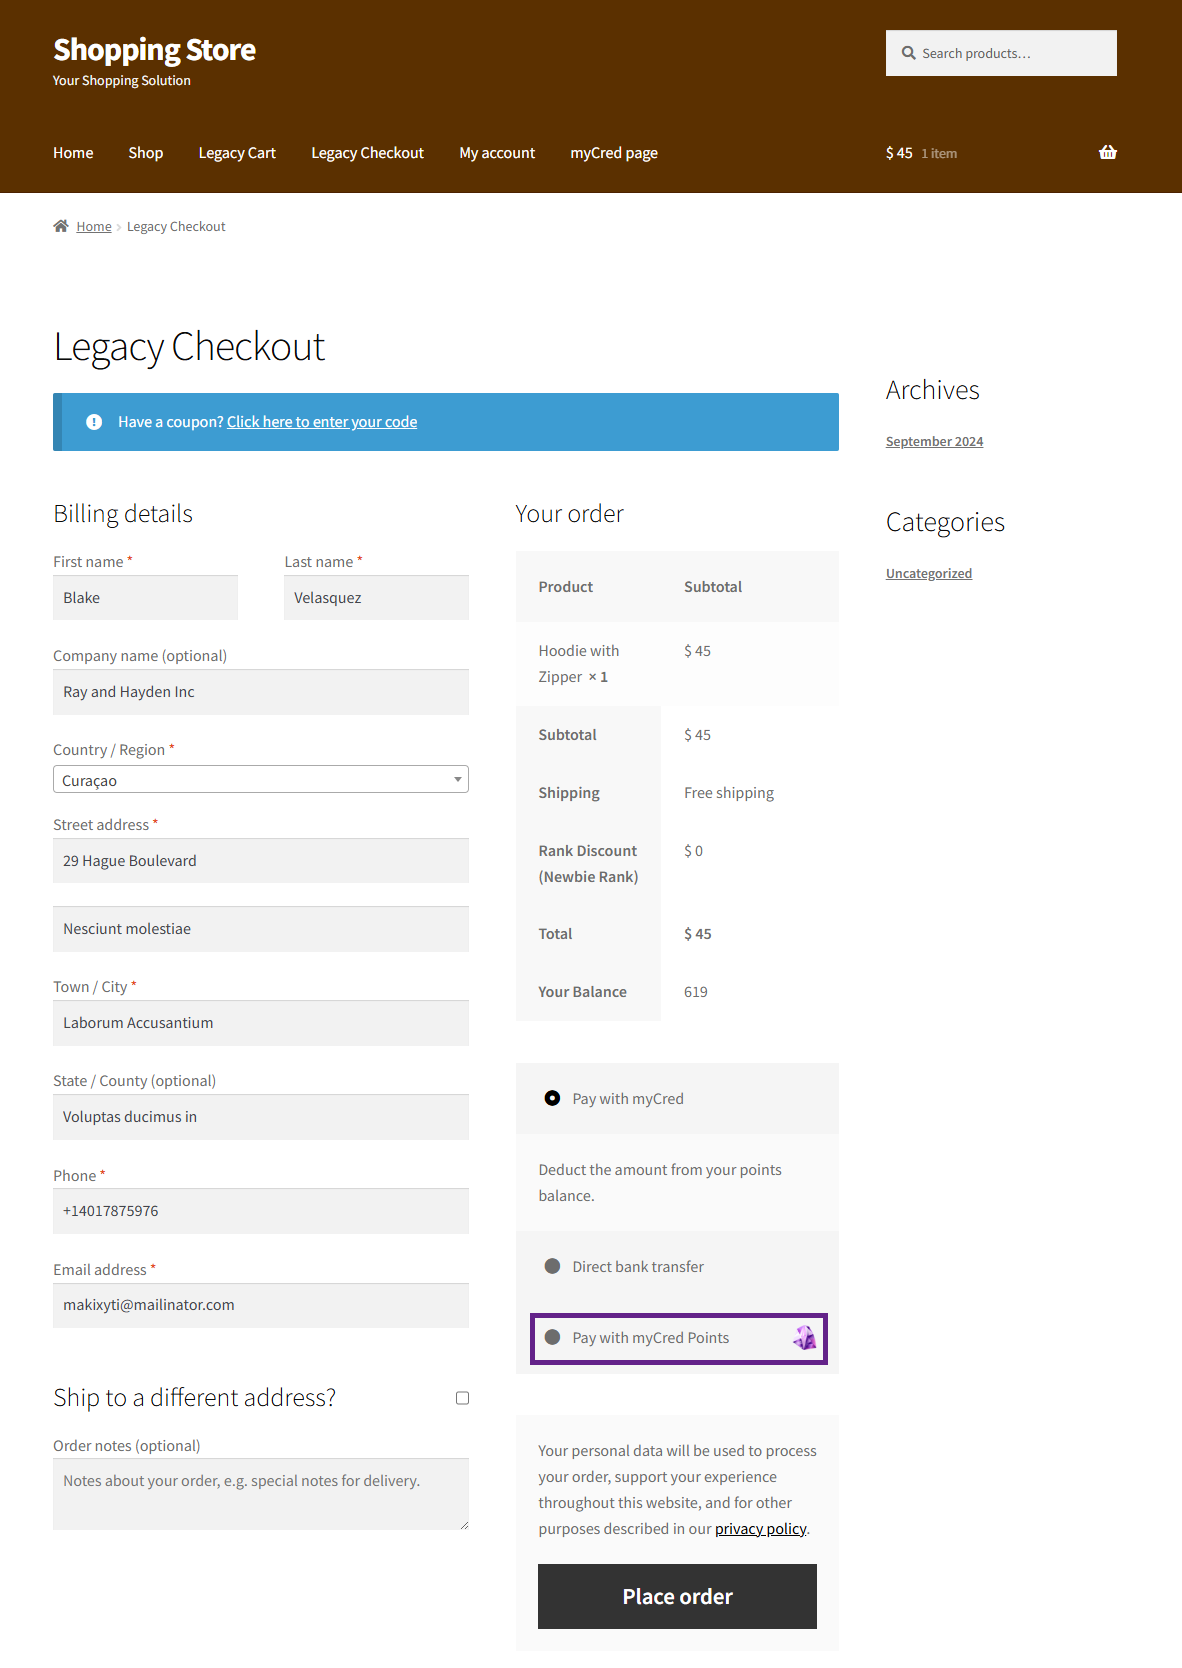
Front-End Impact
Go to the website.
Navigate to the Shop page and add a product to your cart.
Proceed to the Checkout page.
As you can see, the point-type image is displayed as the gateway icon on the front end.