myCred Zapier Addon
myCred Zapier Addon

Introduction
myCred Zapier allows you to integrate myCred with over 200+ online services on the Zapier platform. Zapier gives you the power to automate tasks between services like Salesforce, Gmail, MailChimp, HubSpot, and more.
The plugin provides you the perfect way to integrate myCred with services that are not supported via official add-ons. You can set up actions on Zapier once it’s connected to your website and the myCred Zapier plugin via an API key.
You can add three trigger events using myCRED Zapier:
- Earned Points – Triggers when a user earns points.
- Deducted Points – Triggers when a user loses points.
- Earned Badges – Triggers when a user earns badges.
Zapier actions push or put new data into your API from input fields that users set in their Zaps. Zapier includes search actions to find data in an app and create actions to add new items via API calls.
Installation Guide
Navigate to My Cred > Toolkit and then enable the zapier addon on the toolkit
Settings
- Open your Zapier Account
- Navigate to Create > Zaps
- Press to select a Trigger

- Search for “myCred” and Select it

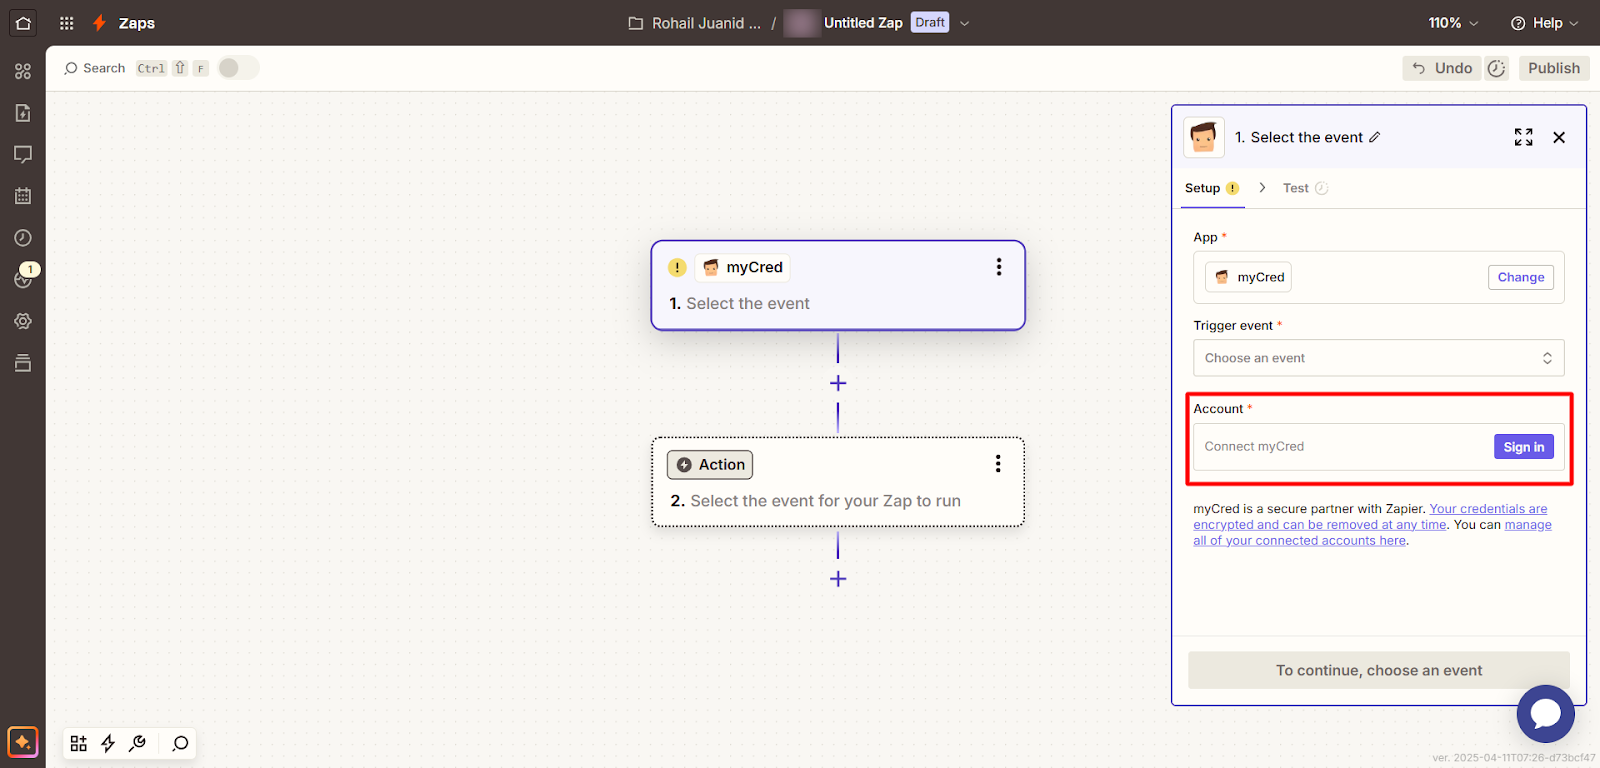
- Connect to your myCred Account (Your Website)
Create a Zapier Account
*You must have a Zapier Account to use the myCred-Zapier add-on.
- Go to URL: https://zapier.com/sign-up/
- Create an account.

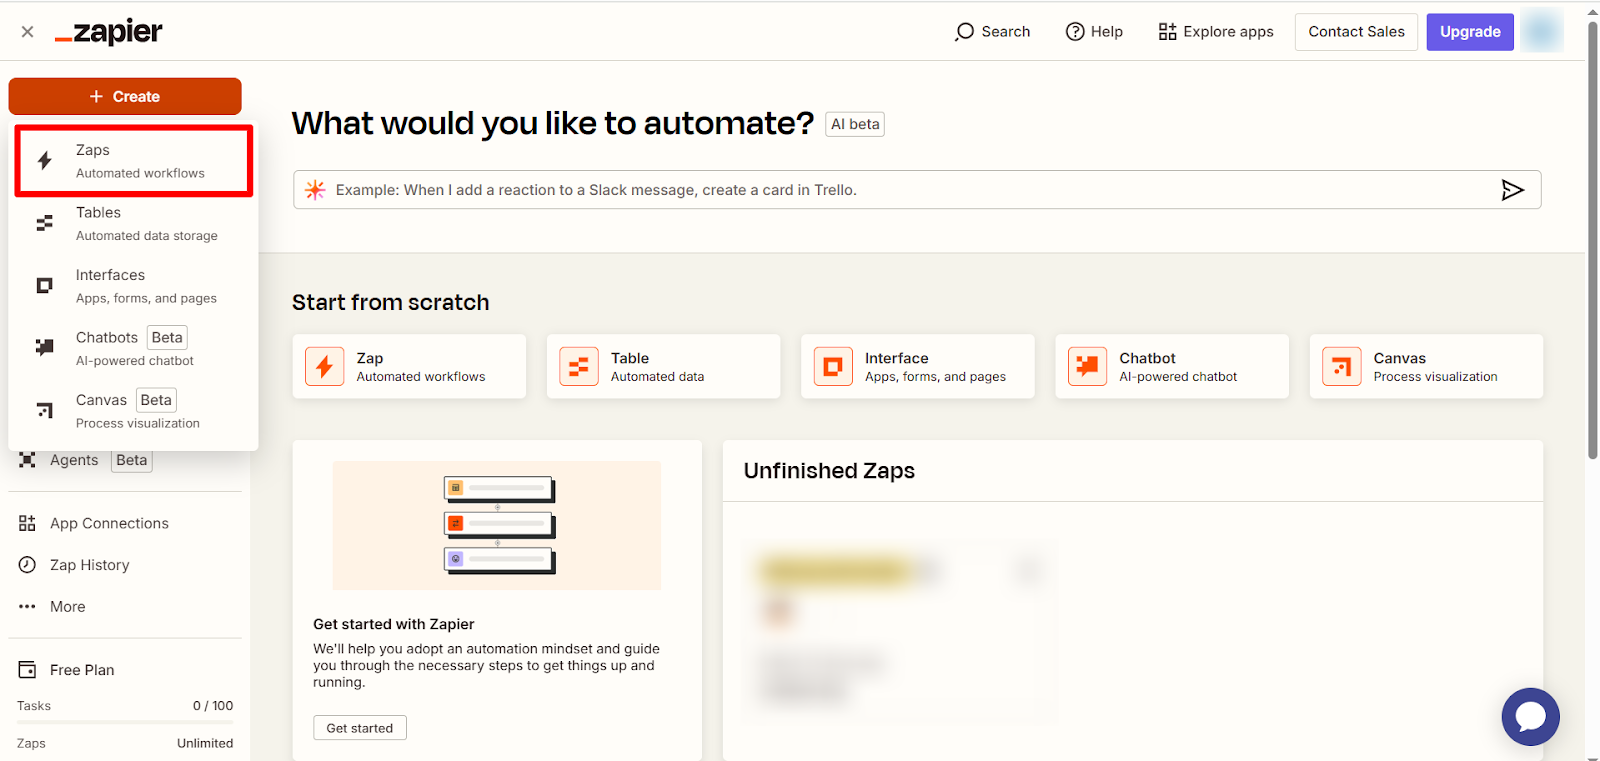
Create a Zap
- Log in to your Zapier account and create a Zap. Zaps allow you to send data between Zapier and myCred.
Select an app event
- On the “Trigger” page, search for myCred in the App Event search bar.
- A trigger is an event that starts your Zap.

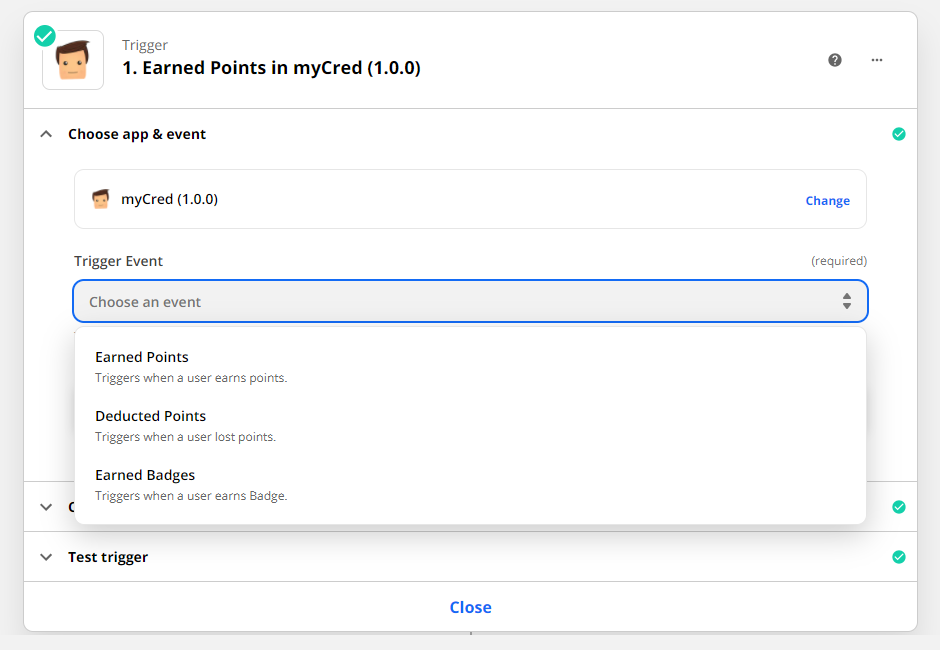
Select a trigger event
- After selecting myCred as your event app, you will be able to see the following trigger events:
- Earned Points – Triggers when a user earns points.
- Deducted Points – Triggers when a user loses points.
- Earned Badges – Triggers when a user earns badges.
- Earned Ranks – Triggers when a user earns ranks.
- Lost Ranks – Triggers when a user lost ranks.
Sign in to your myCred account
- Click on the “sign in to myCred” button
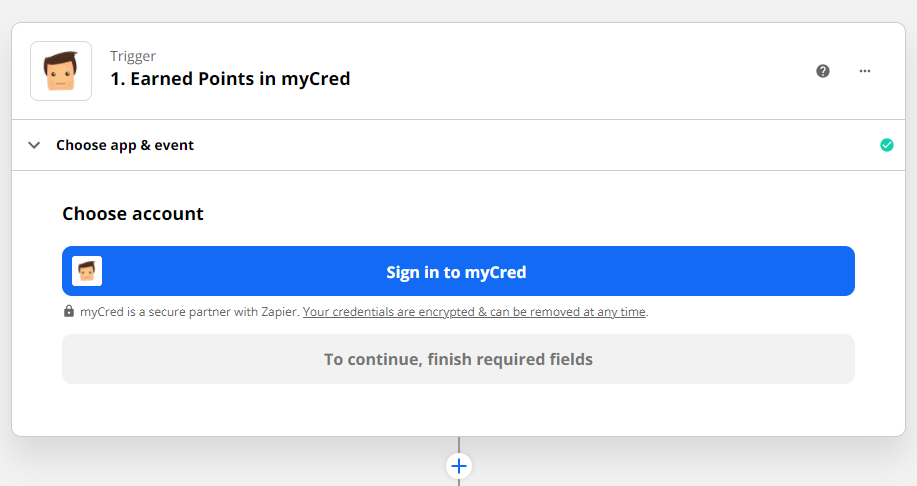
- A pop-up window will appear.

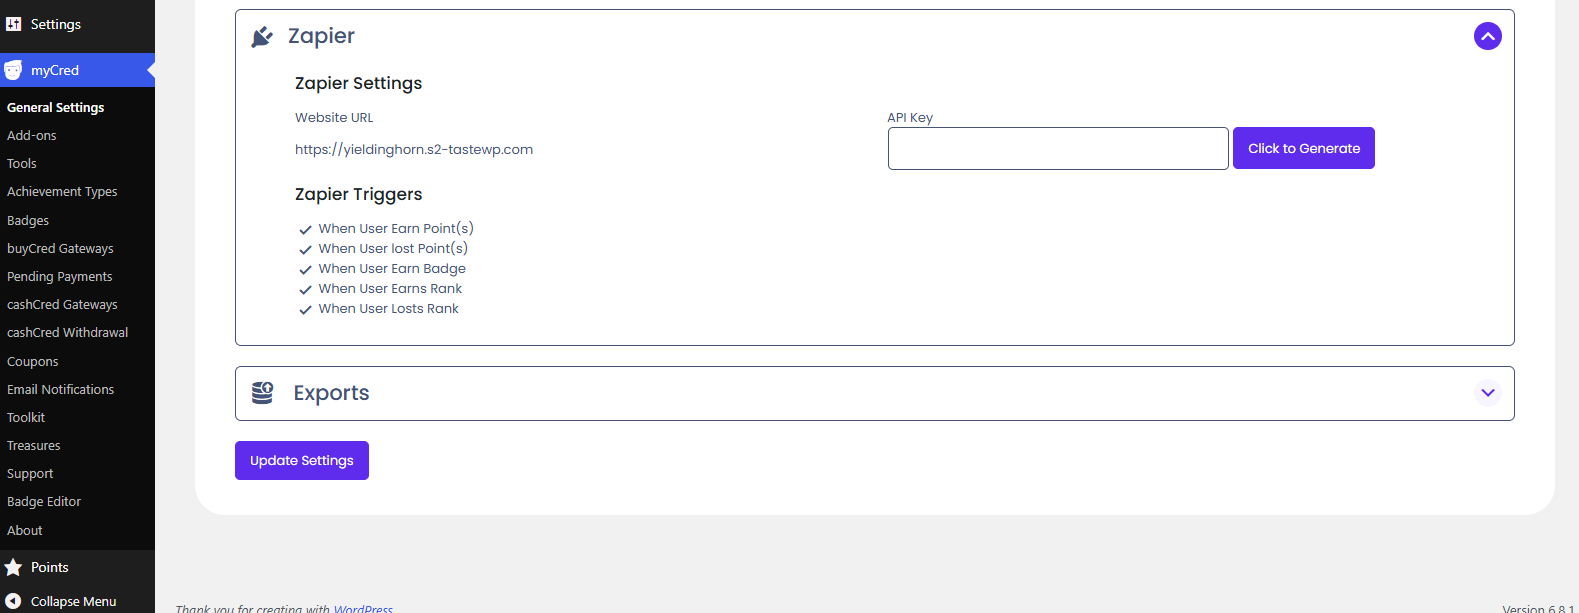
Retrieve Website URL and API Key from your website
- Go to your website > Admin Dashboard > myCred > Settings > Zapier
- Click on the “Click to Generate” button
- Click on the “Update Settings” button
- Copy Website URL and API Key.
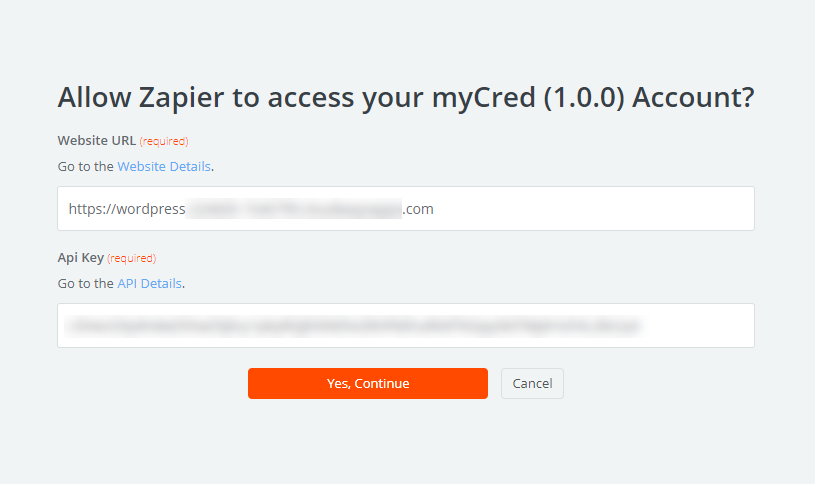
- Enter your Website URL and API Key.
- Click on the “Continue” button.
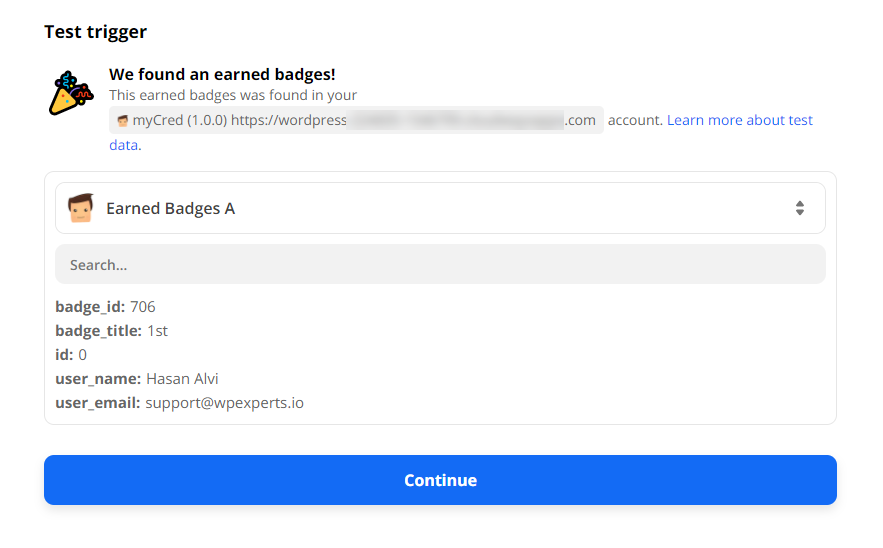
Test Event Trigger
- Click on the “Test Trigger” to view your last event log.

- Test trigger result.
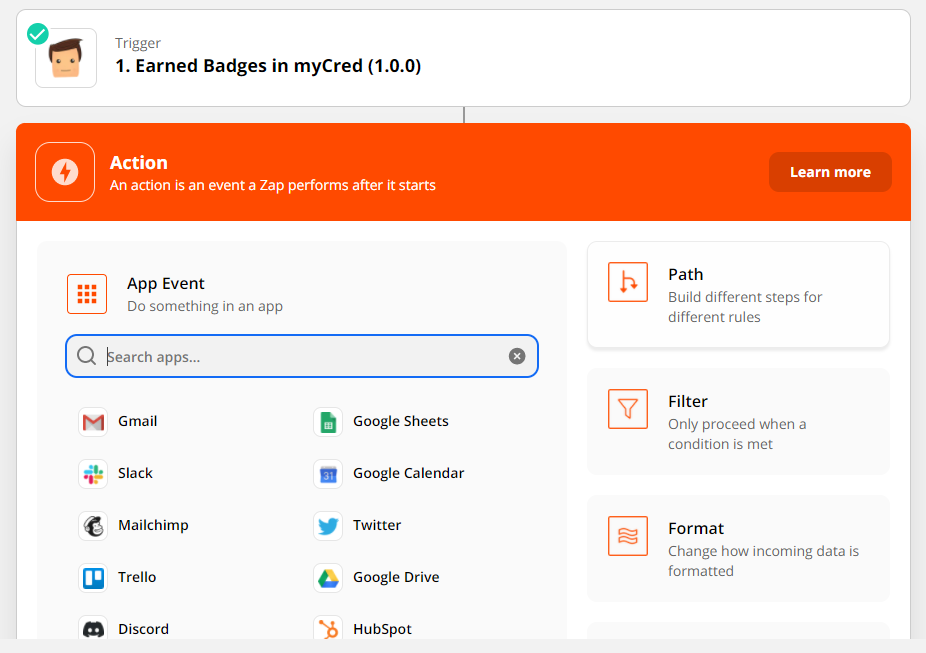
Select an action
- Search for the app you want to connect with myCred Zapier in the search bar. This will allow you to use the trigger events for those applications.
- The data will be reflected on the selected action (e.g. if the user selected Gmail or Google SpreadSheet, the data will be reflected there.)
- Fill out the form.
- Click Continue.

Your Zap is complete and tested now. You can now turn it on for the automation process. So whenever a certain hook triggers action associated with it will be performed.