Accepting Points as Payment
Accepting Points as Payment
Once you have installed and enabled this plugin, myCred will become visible as a gateway on your Events > Payment Gateways page, in your wp-admin area. Here, by clicking on the gateways name, you can select to edit it’s settings to suit your site.
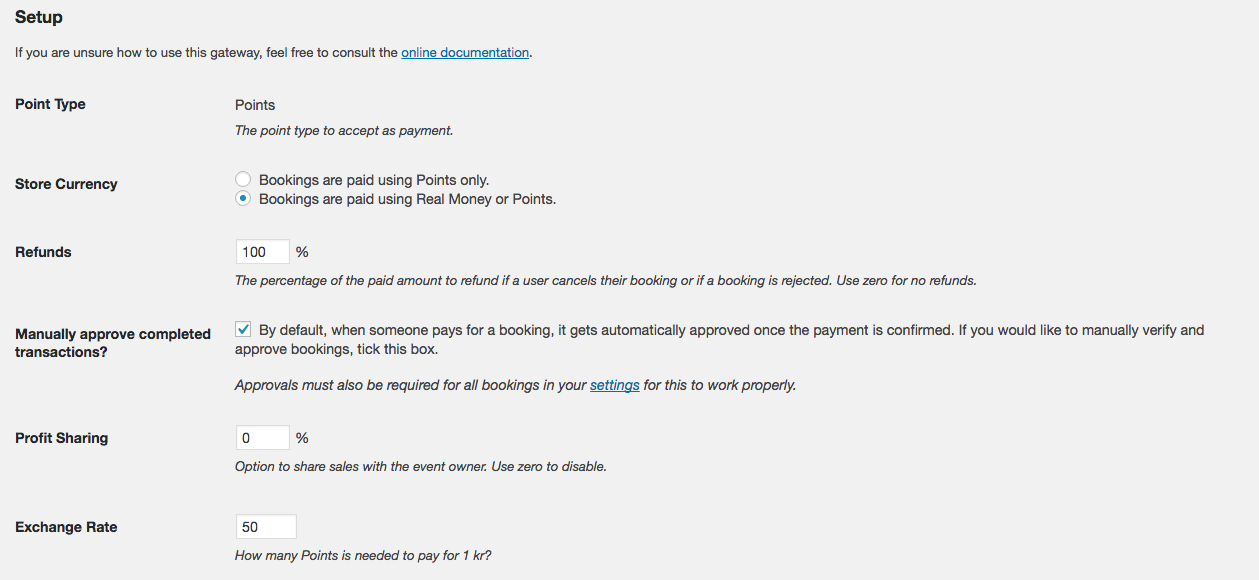
First, if you have more than one point type setup in myCred, you will be required to select which point type you want to accept as payment. Next we need to select that “Bookings are paid using Real Money or Points”. This ensures that your users can still pay for tickets with real money if they can not afford to pay using points.
Next you need to select how much you want to refund if a booking is rejected or if the user selects to cancel their booking (if allowed). This needs to be a percentage where 100 represents a full refund and zero equaling no refunds. This field can not be left empty!
Just like any other payment gateway for Events Manager, the myCred gateway supports “Manual Approvals”. If this is something you use, make sure to check this option.
The gateway has a built-in profit share payout system, which allows you to share a percentage of the point cost with the event owner. If you do not wish to use this feature, please make sure to set this value to zero.
Finally we need to set an exchange rate. This will tell the gateway how many points is needed in order to pay for a ticket. This can be 1 for a 1=1 ratio or any other value. This field can not be left empty!
Log Templates
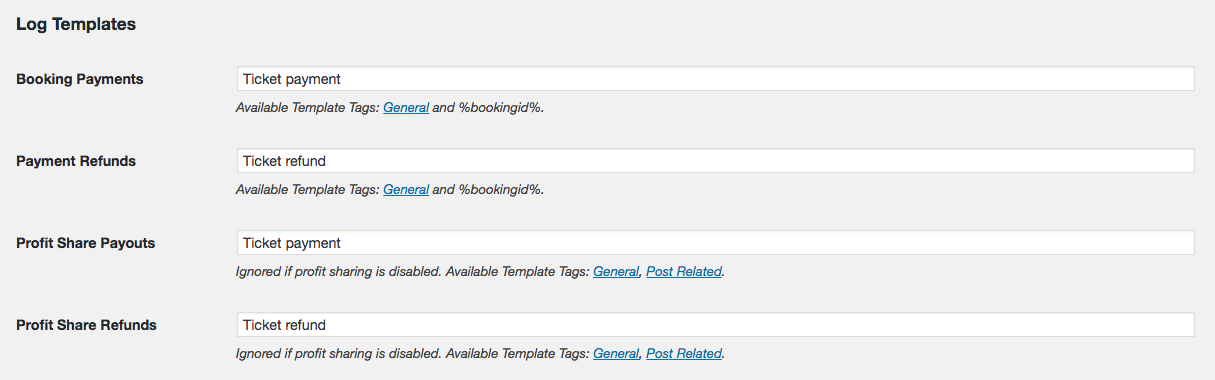
Next we need to set what our users will see in their points history when they pay for a ticket using points, on refunds (if enabled), on profit share payouts and on profit share refunds.
In previous versions of this plugin, the “Booking Payments” and “Payment Refunds” have both supported Post related template tags. However this is no longer possible. You can however still use the %bookingid% template tag if you want to show your users which order a particular payment is related to.
The profit share templates however do support post related template tags.
Labels

Next we need to set what kind of labels we want to use in your bookings or if you use multibookings, your checkout page. None of the fields here can be left empty!
Labels
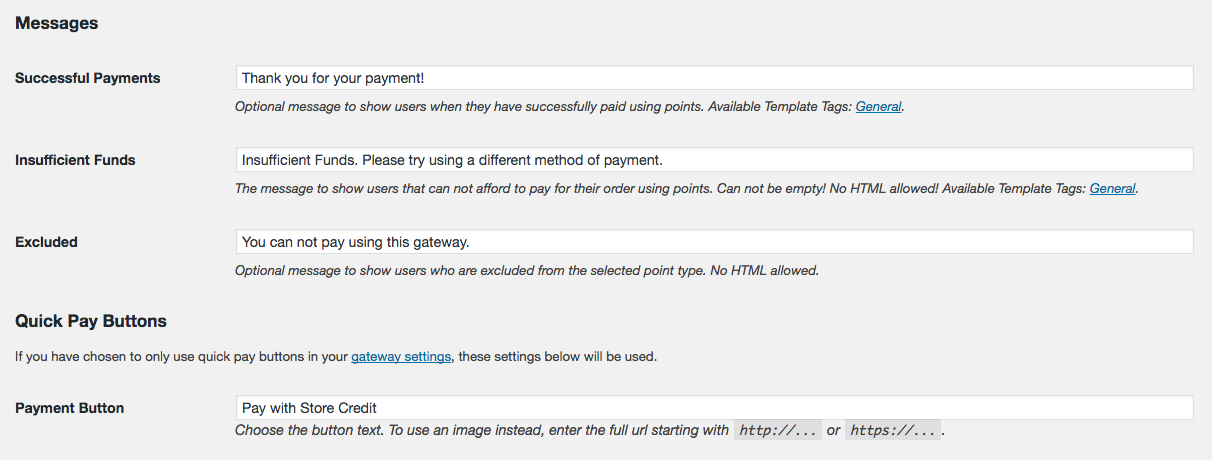
Finally we need to set some messages for our users. Messages that are shown when a payment was successfully made, in case a user can not afford to pay or if the user is excluded from using the point type. None of these fields support HTML elements and can not be left empty!
If used, you can also select the language to use in Quick pay buttons.
Remember to always save!