Setup
Settings Up Notifications
Once you have enabled the plugin, you will gain access to the Notifications setup on your first point types settings page. Here you can style and design your notifications along with enabling custom features.
Base Settings
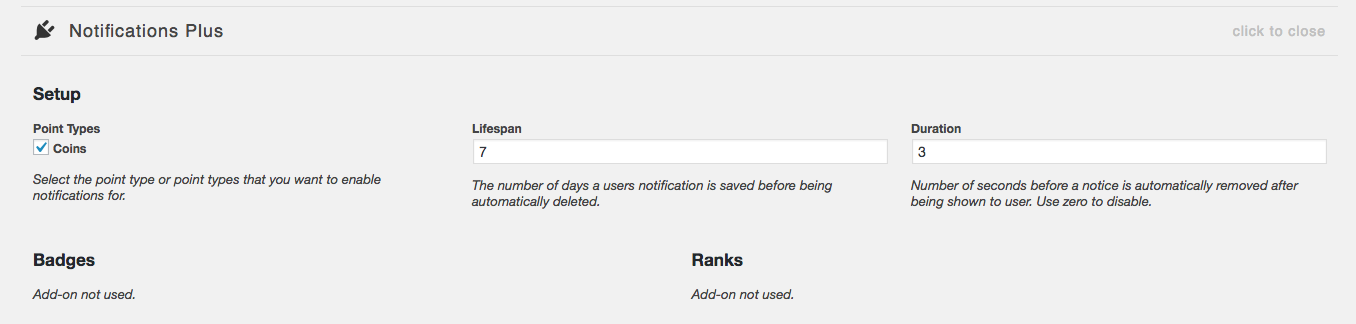
First we need to select which point type(s) we want to enable notifications for. At least one type has to be selected in order for this add-on to work.
Next we need to set how long a notification is saved before it is deleted along with the number of seconds a notice is shown to a user. Here you can select to automatically remove a notification after x number of seconds or turn this off, in which case the user will have to remove it by clicking on the removal icon. Of course if they refresh the page or go to a different page, the notification will disappear.
Badges
If you have the Badges add-on enabled you can select to show users a custom notification each time they earn a badge.
Ranks
If you have the Ranks add-on enabled, you can select to show users a custom notification when a user is promoted or demoted.
Styling
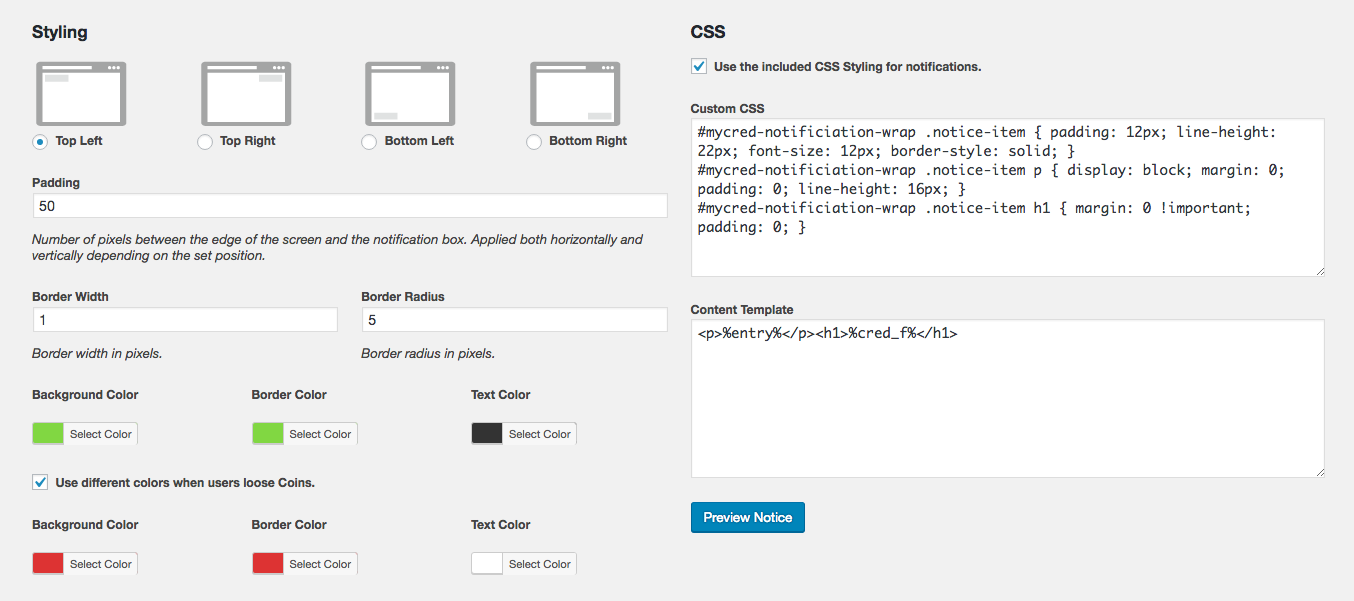
Next comes the fun part, designing and styling our notifications. First we need to choose what corner the notifications will show up. You can set the padding between the edge of the screen and the edge of the notification box.
You can also set the border width and the border radius. You can select to have all notifications of one particular color, or if you want to use a different setup when a user loses points from when they gain points.
If you feel comfortable with CSS and HTML you can also edit the CSS style for the notification layout along with the template that is used.